


We’ve always walked our property together, but this time Jim had to go it alone. I stayed home to be with our Westie, Hanna who recently had ACL and Meniscus surgery. Thankfully, she is doing great. This trip was a little different, but Jim included me by using Facetime during his first visit back to the build. We saw the progress together as we walked around the house and site. Y’all, it looks so good!

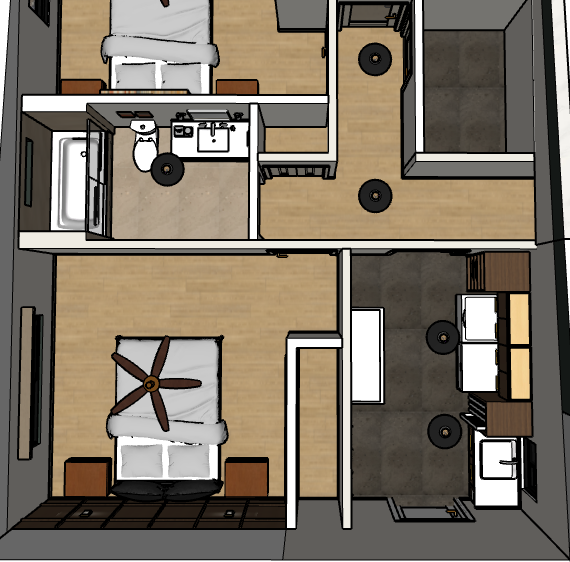
We are so pleased with the progress J Martin Builders have made on the house. Most of the framing and all but one window has been installed in the house. You can now feel the size of the rooms, views captured by the windows and how much light comes into the spaces. The roof is in and has been waterproofed, so we’re now dried in just in time for winter. The lighting and electrical plan is almost complete with just a few changes from the electrician’s plan.
Take a look at my last post (The Guts) for additional information about our lighting and electrical plan:
Things are moving fast, so in today’s post, I’ll share our plumbing and HVAC plans. I’ll also share what you can expect from your independent inspector. We’re finalizing the bathroom choices, so I’ll share pictures and details of those spaces too.
Water – In & Out
As many of you know from my prior post, we’ve got water. Our inherited well is flowing at 43 gallons per minute, but now we’ve got to get water to and from the house. The excavator, Glacier Construction will dig trenches from the house to the septic tank and drain field. They will also trench for plumbing lines from the existing well to the house. Thanks to our rocky soil, the excavator will have no problem digging, even in the winter. The builder will get the water tested and recommend filtration systems. If you’re using well water, it should be tested yearly to ensure quality drinking water.

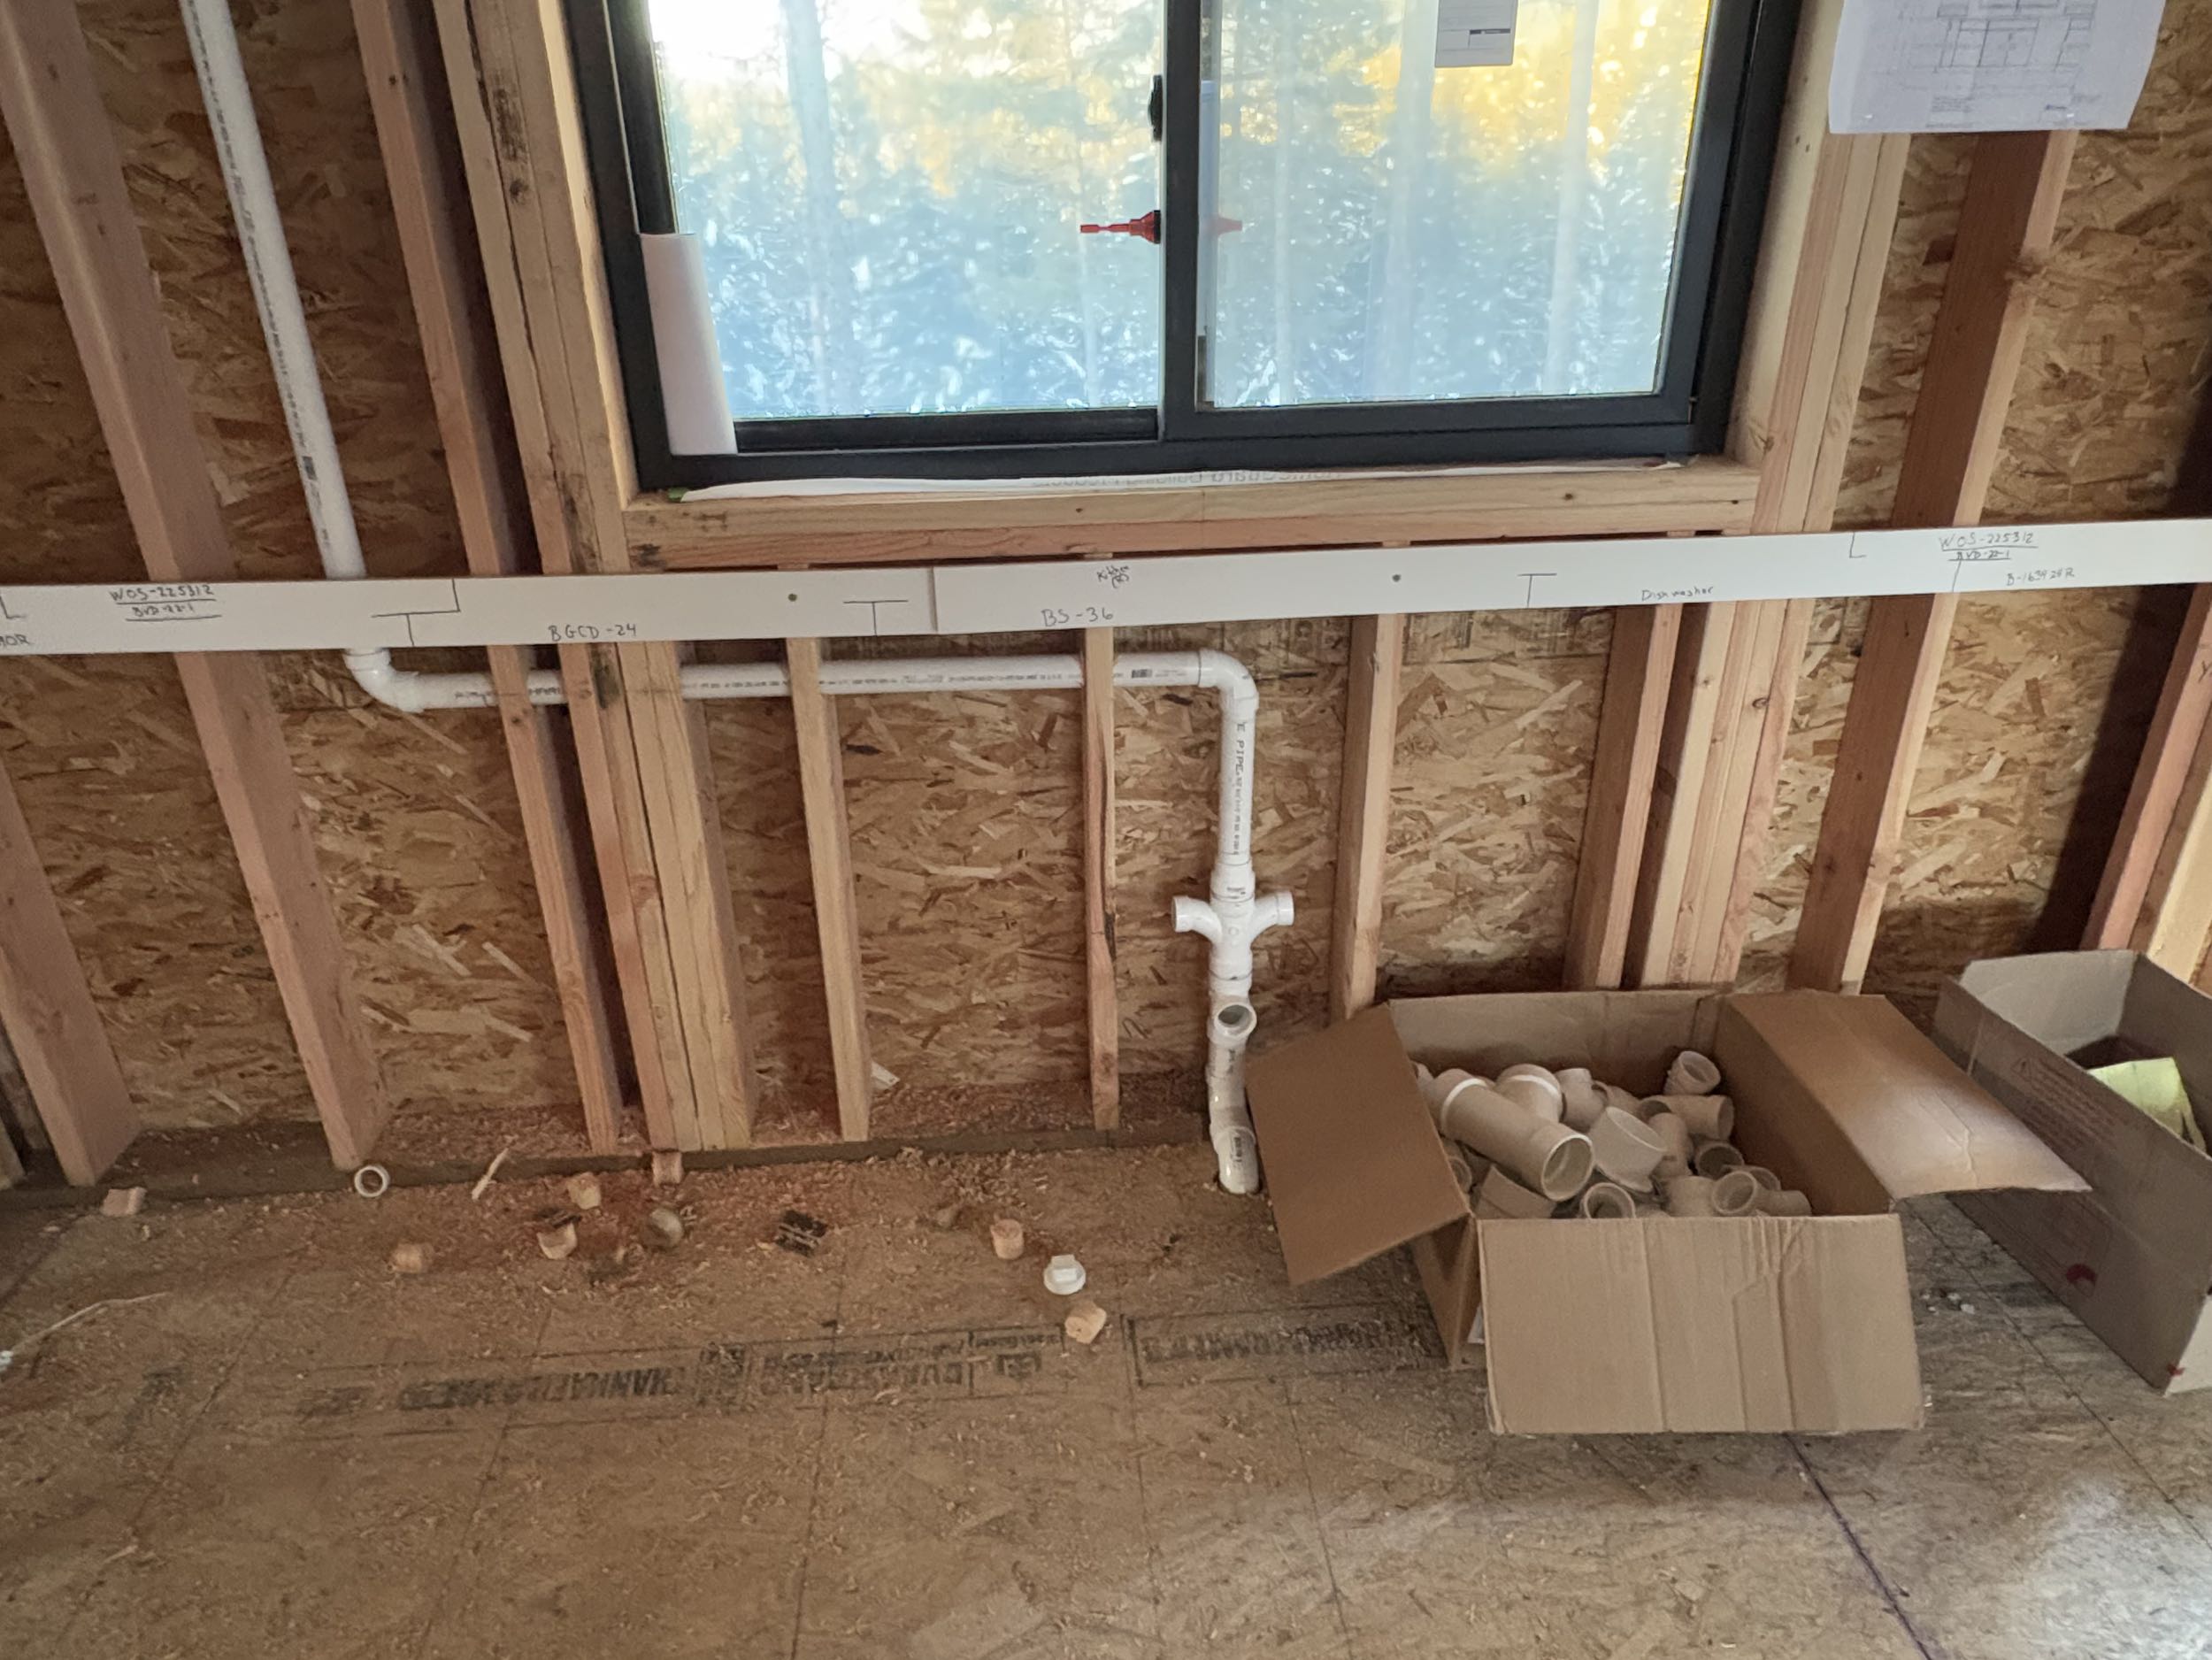
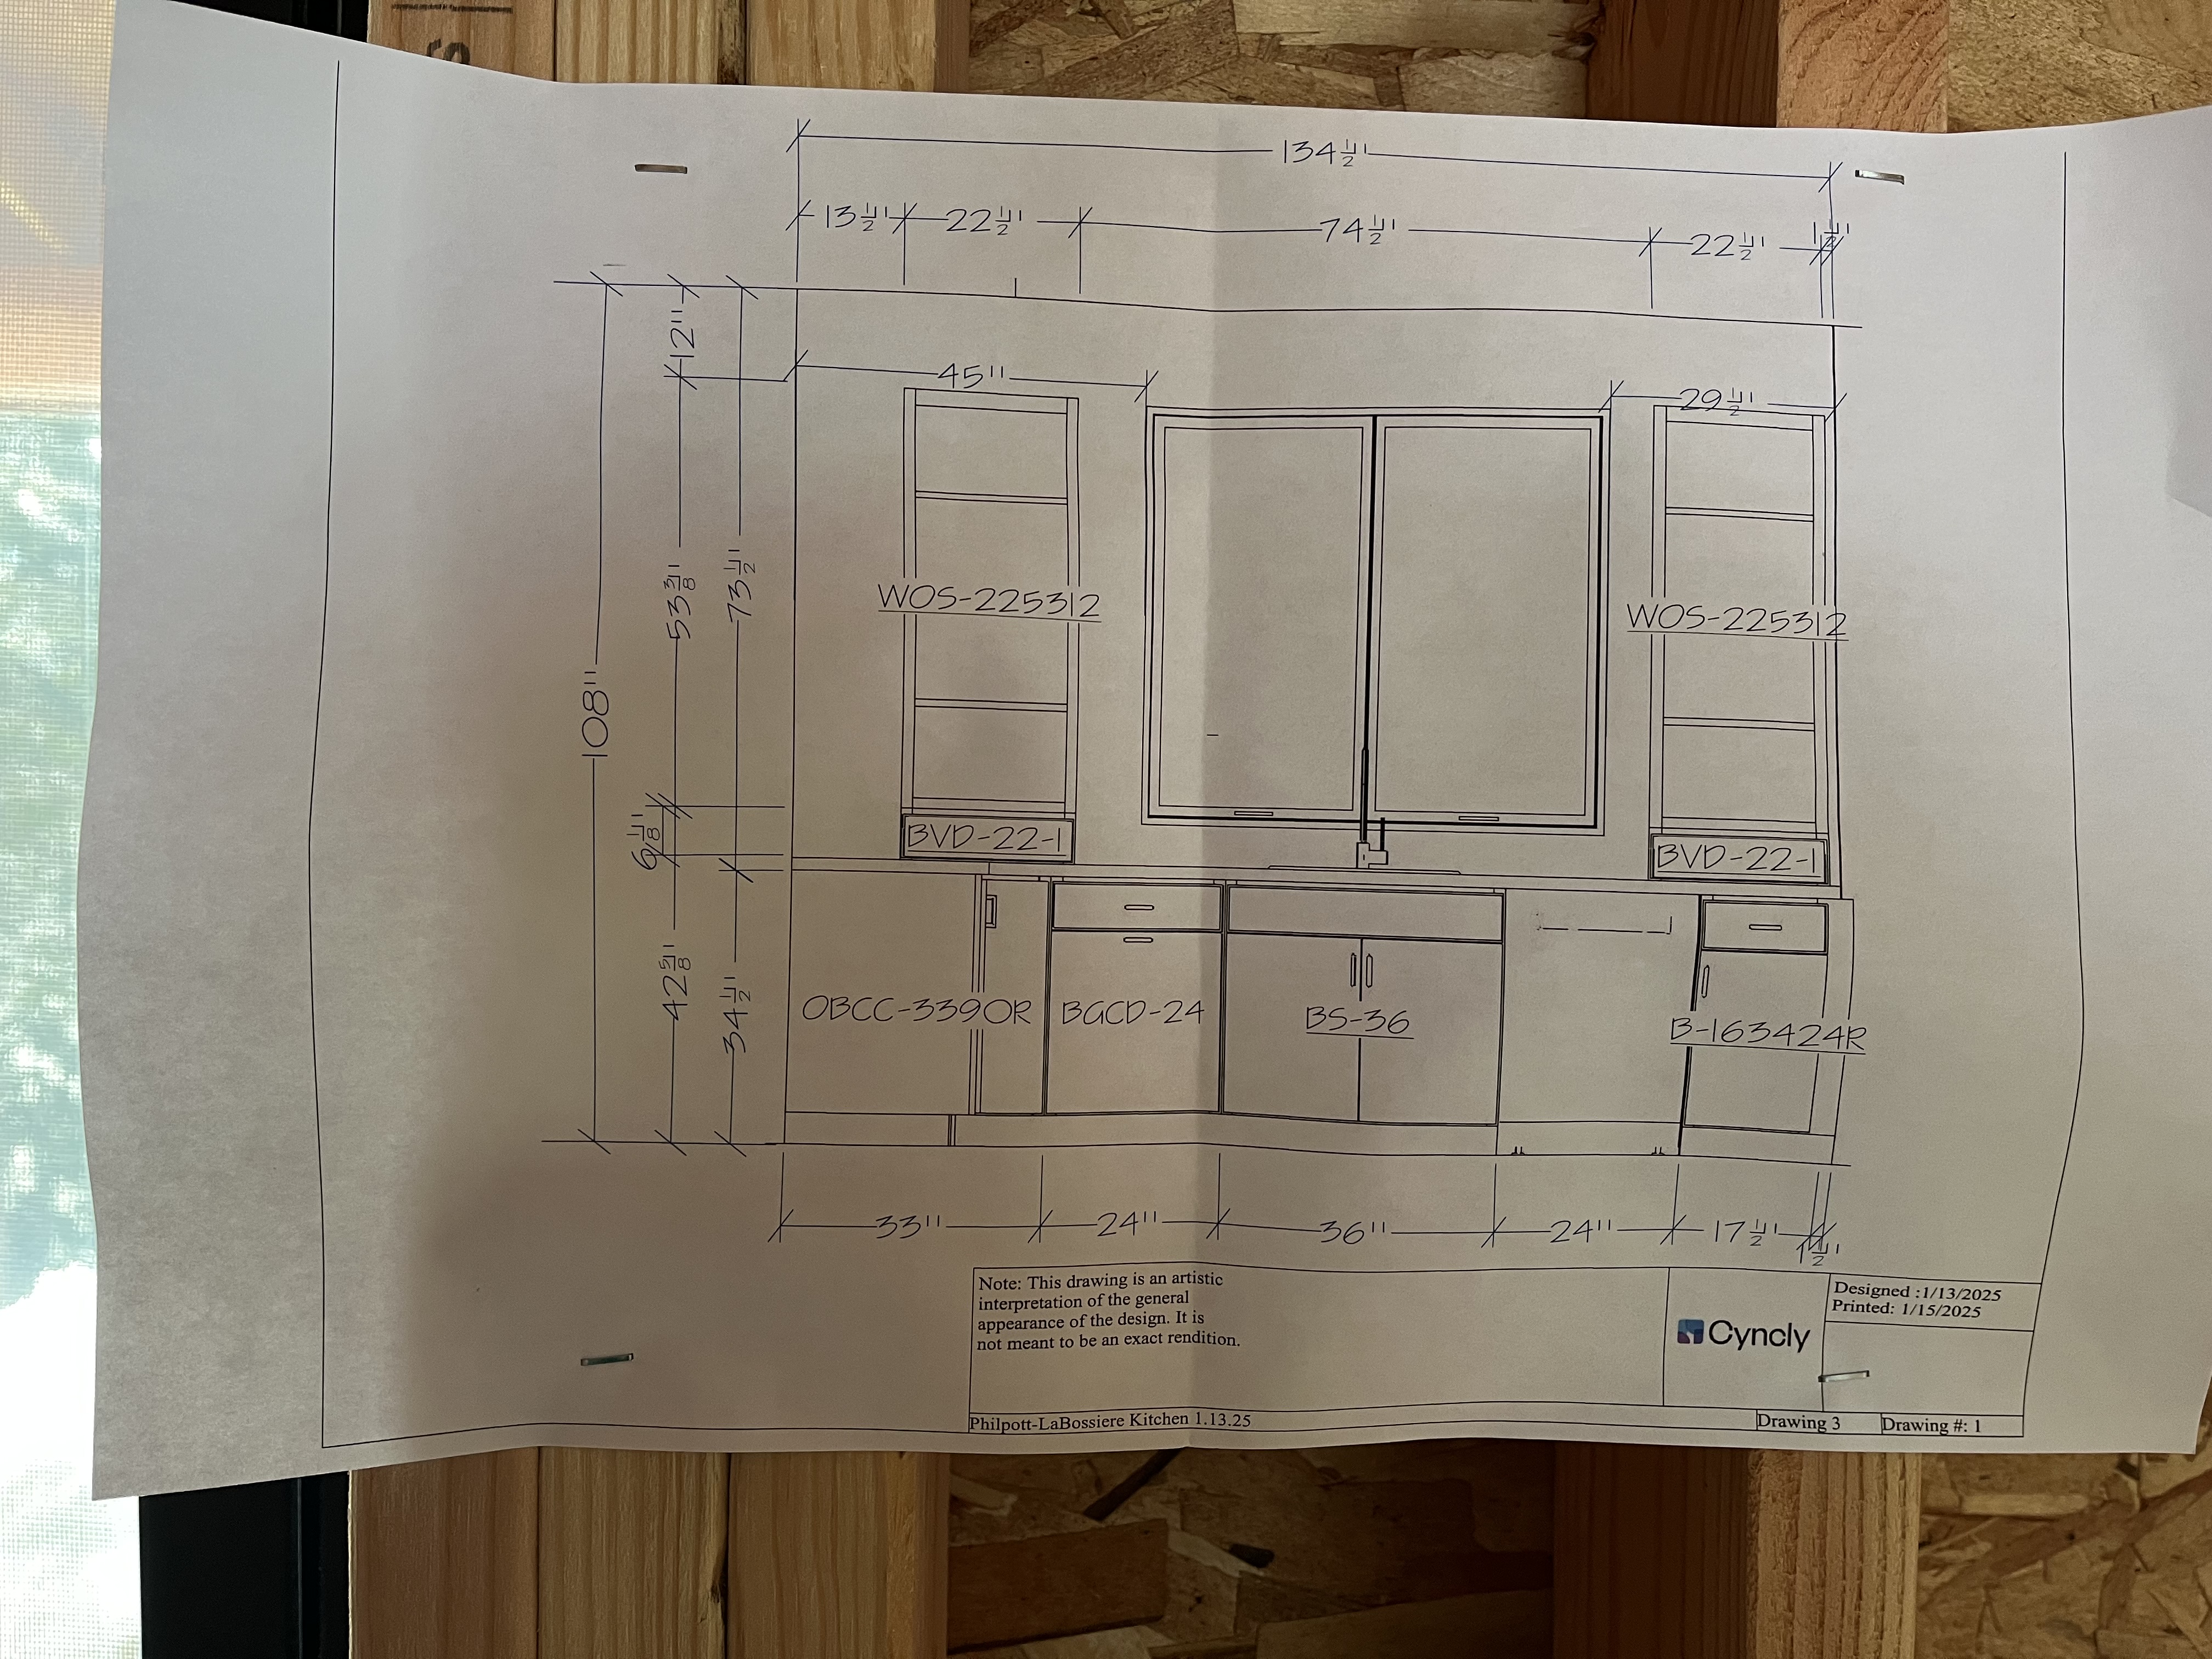
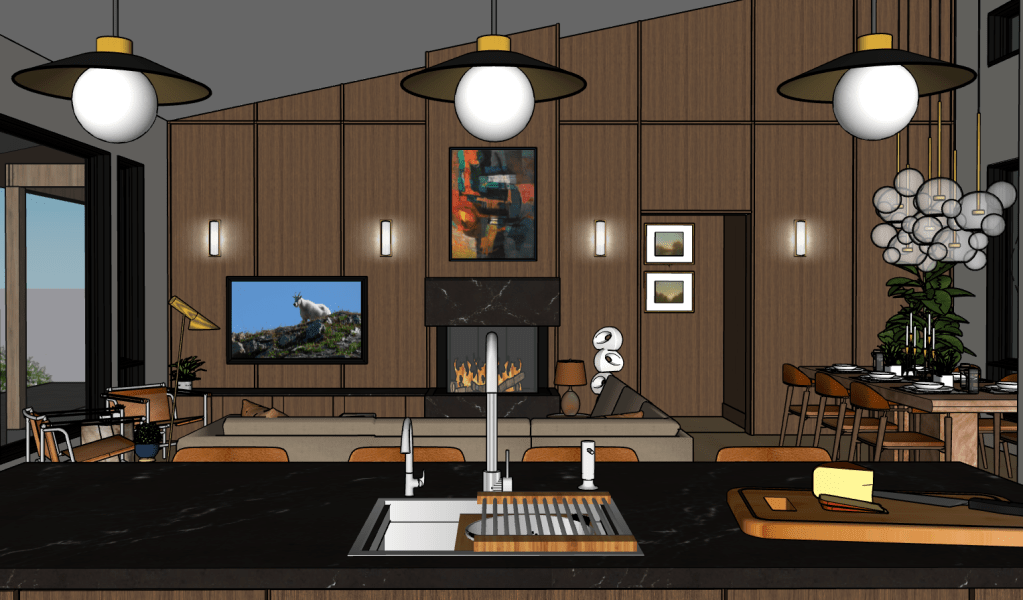
When it comes to plumbing in a new construction home, there are several key considerations to keep in mind to ensure a reliable, efficient, and long-lasting system. You’ll want to consider plumbing details for your kitchen, bathrooms, laundry, and internal outdoor spigots. For example, we have a prep and cleanup sink in our kitchen, so the plumber will need to run two lines in the kitchen. Another example is the wall-mounted bathroom faucets, which will be placed on top of the backsplash to protect the wall from water. Cleaning the bathroom counter is so much easier with a wall mounted faucet!
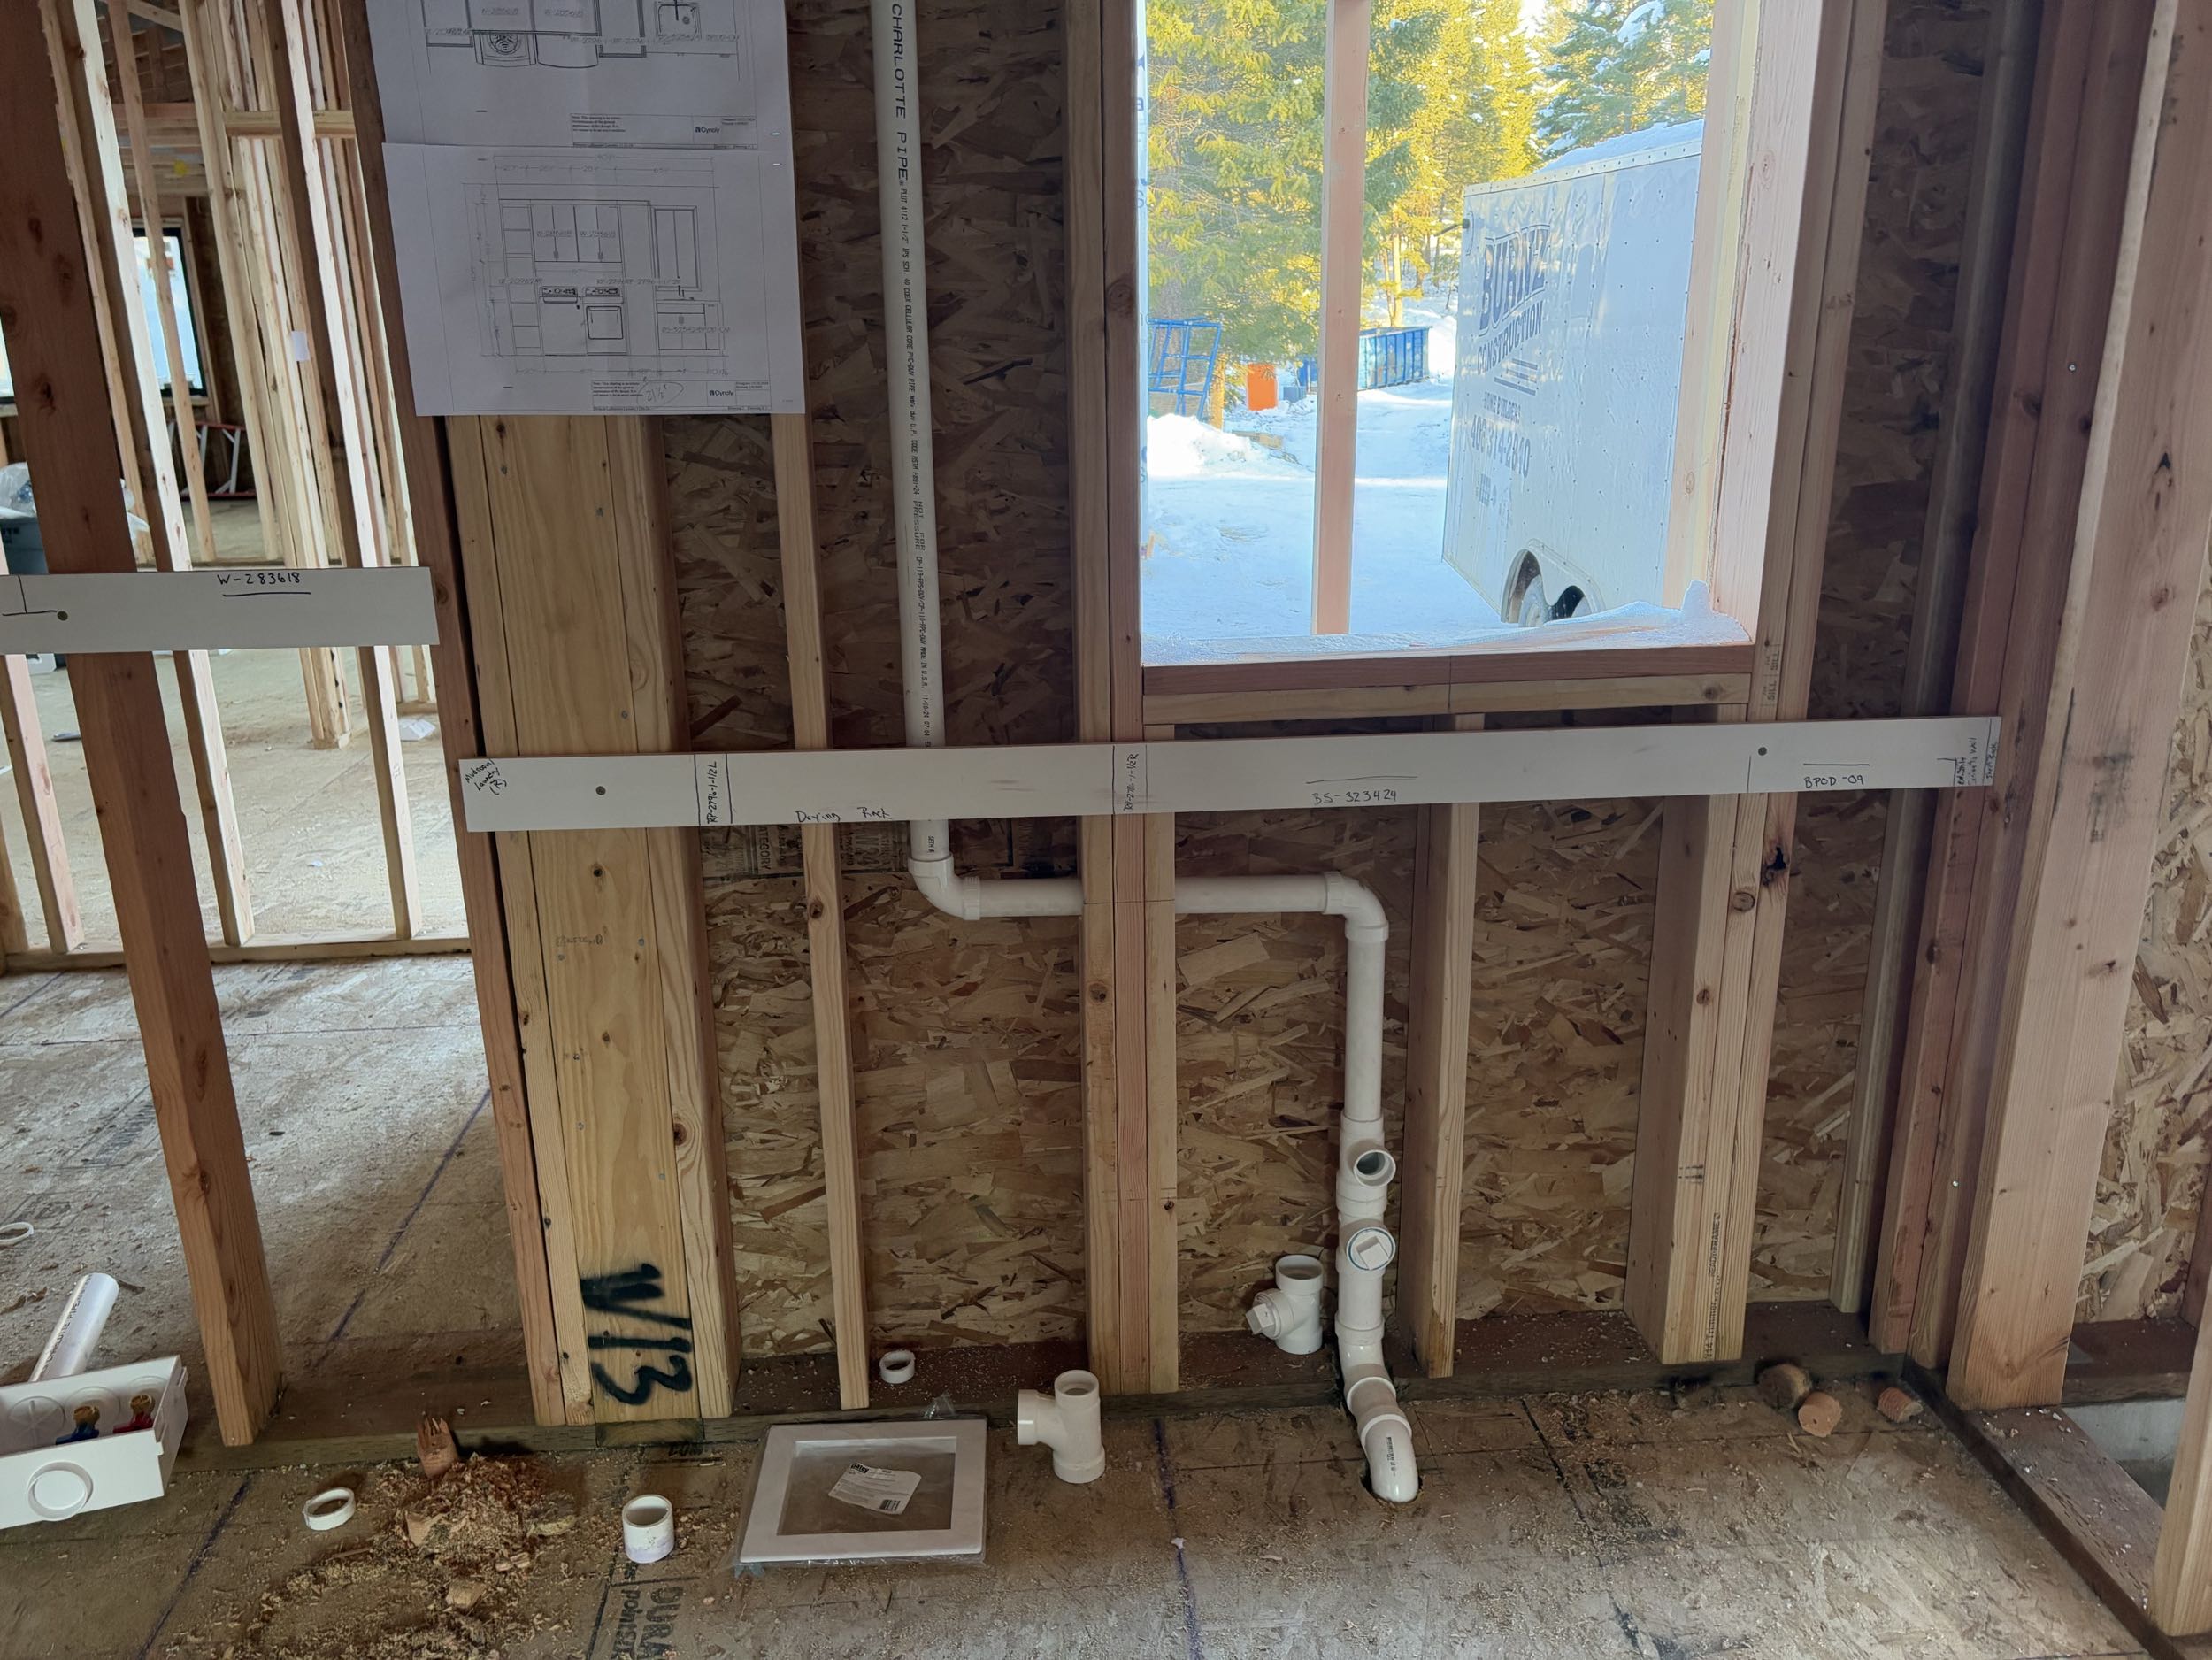
As you can see, the drain is going down and the vent is going up for cleanup sink in the kitchen below:
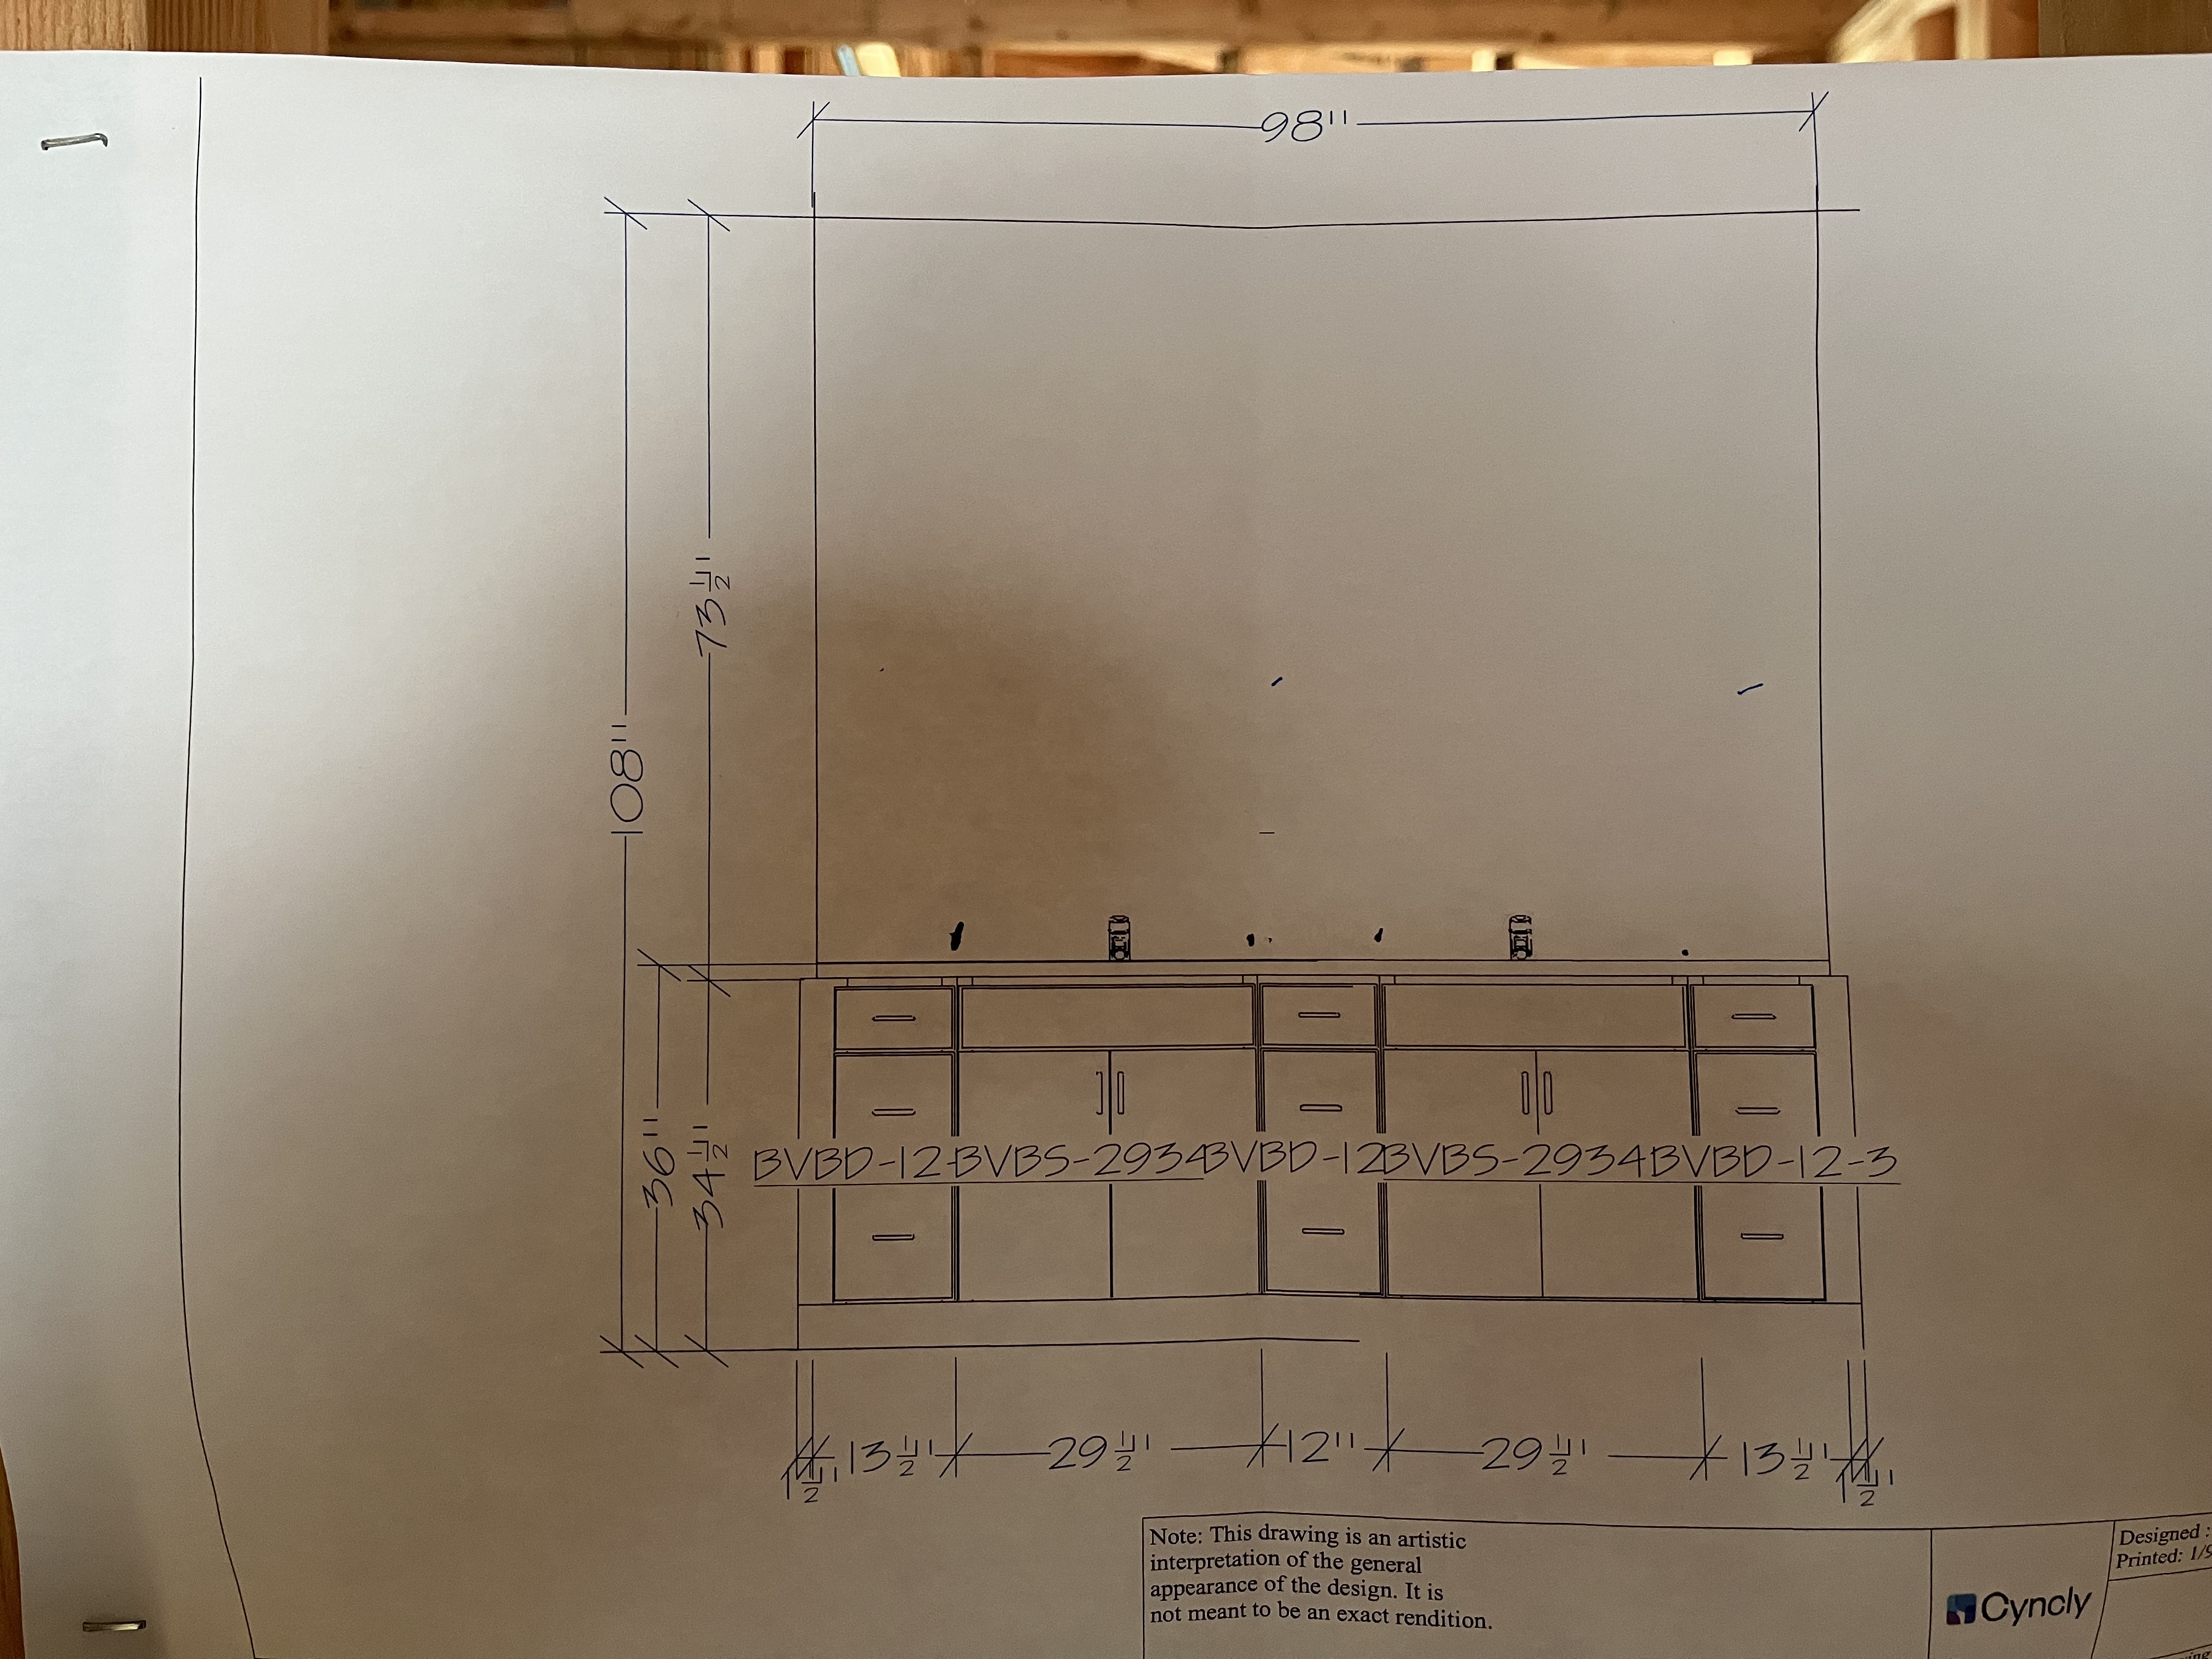
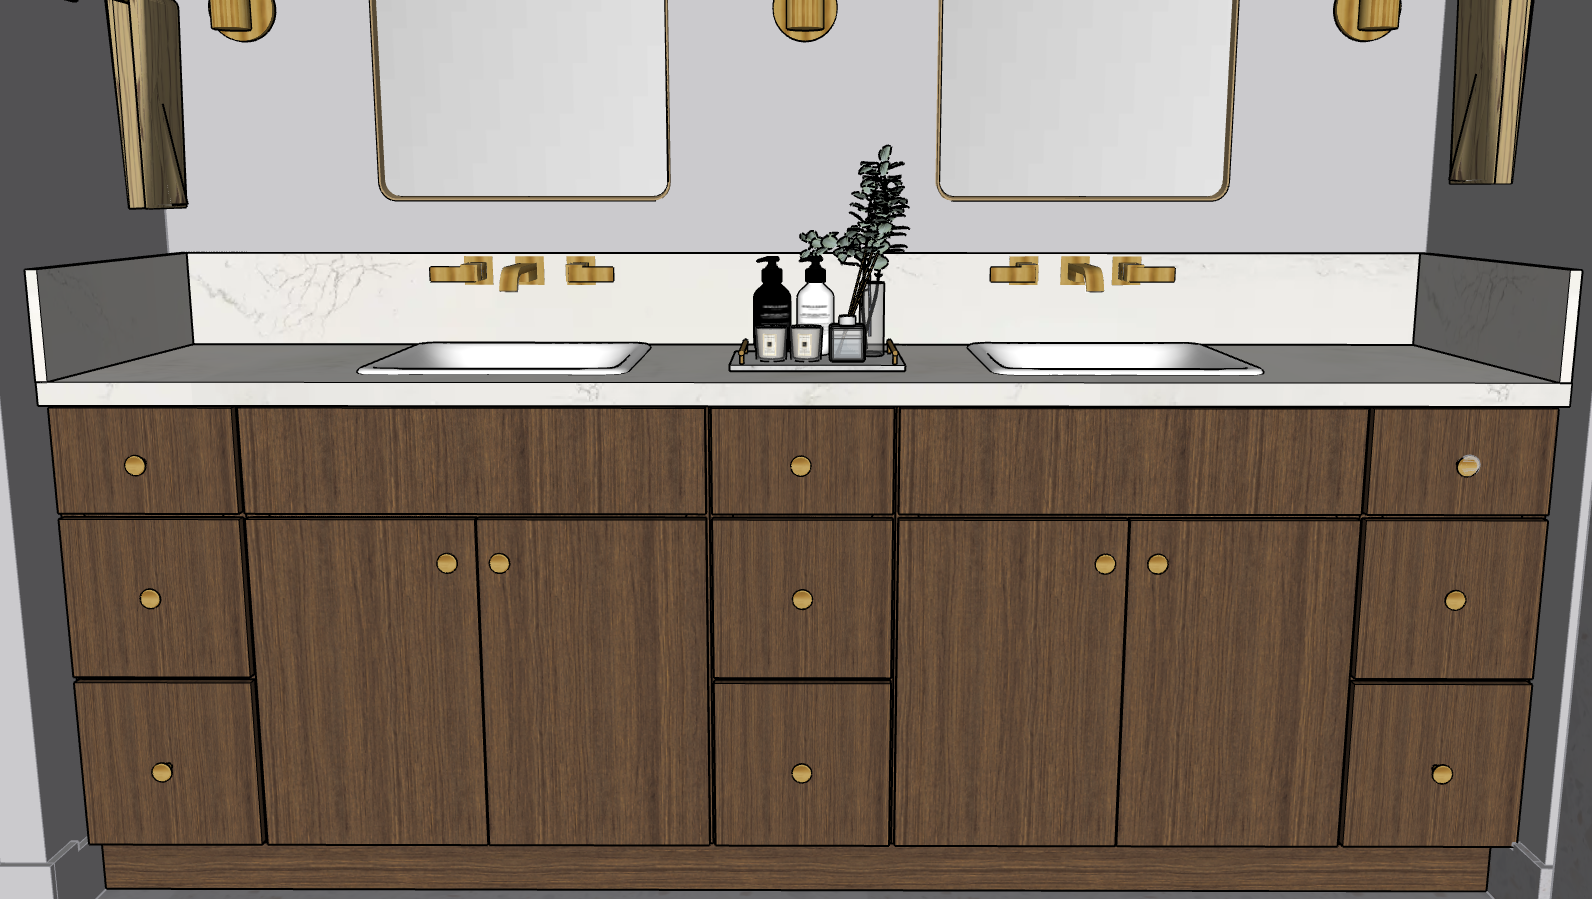
As you can see, the drain is going down and the vent is going up for primary bathroom double vanity.

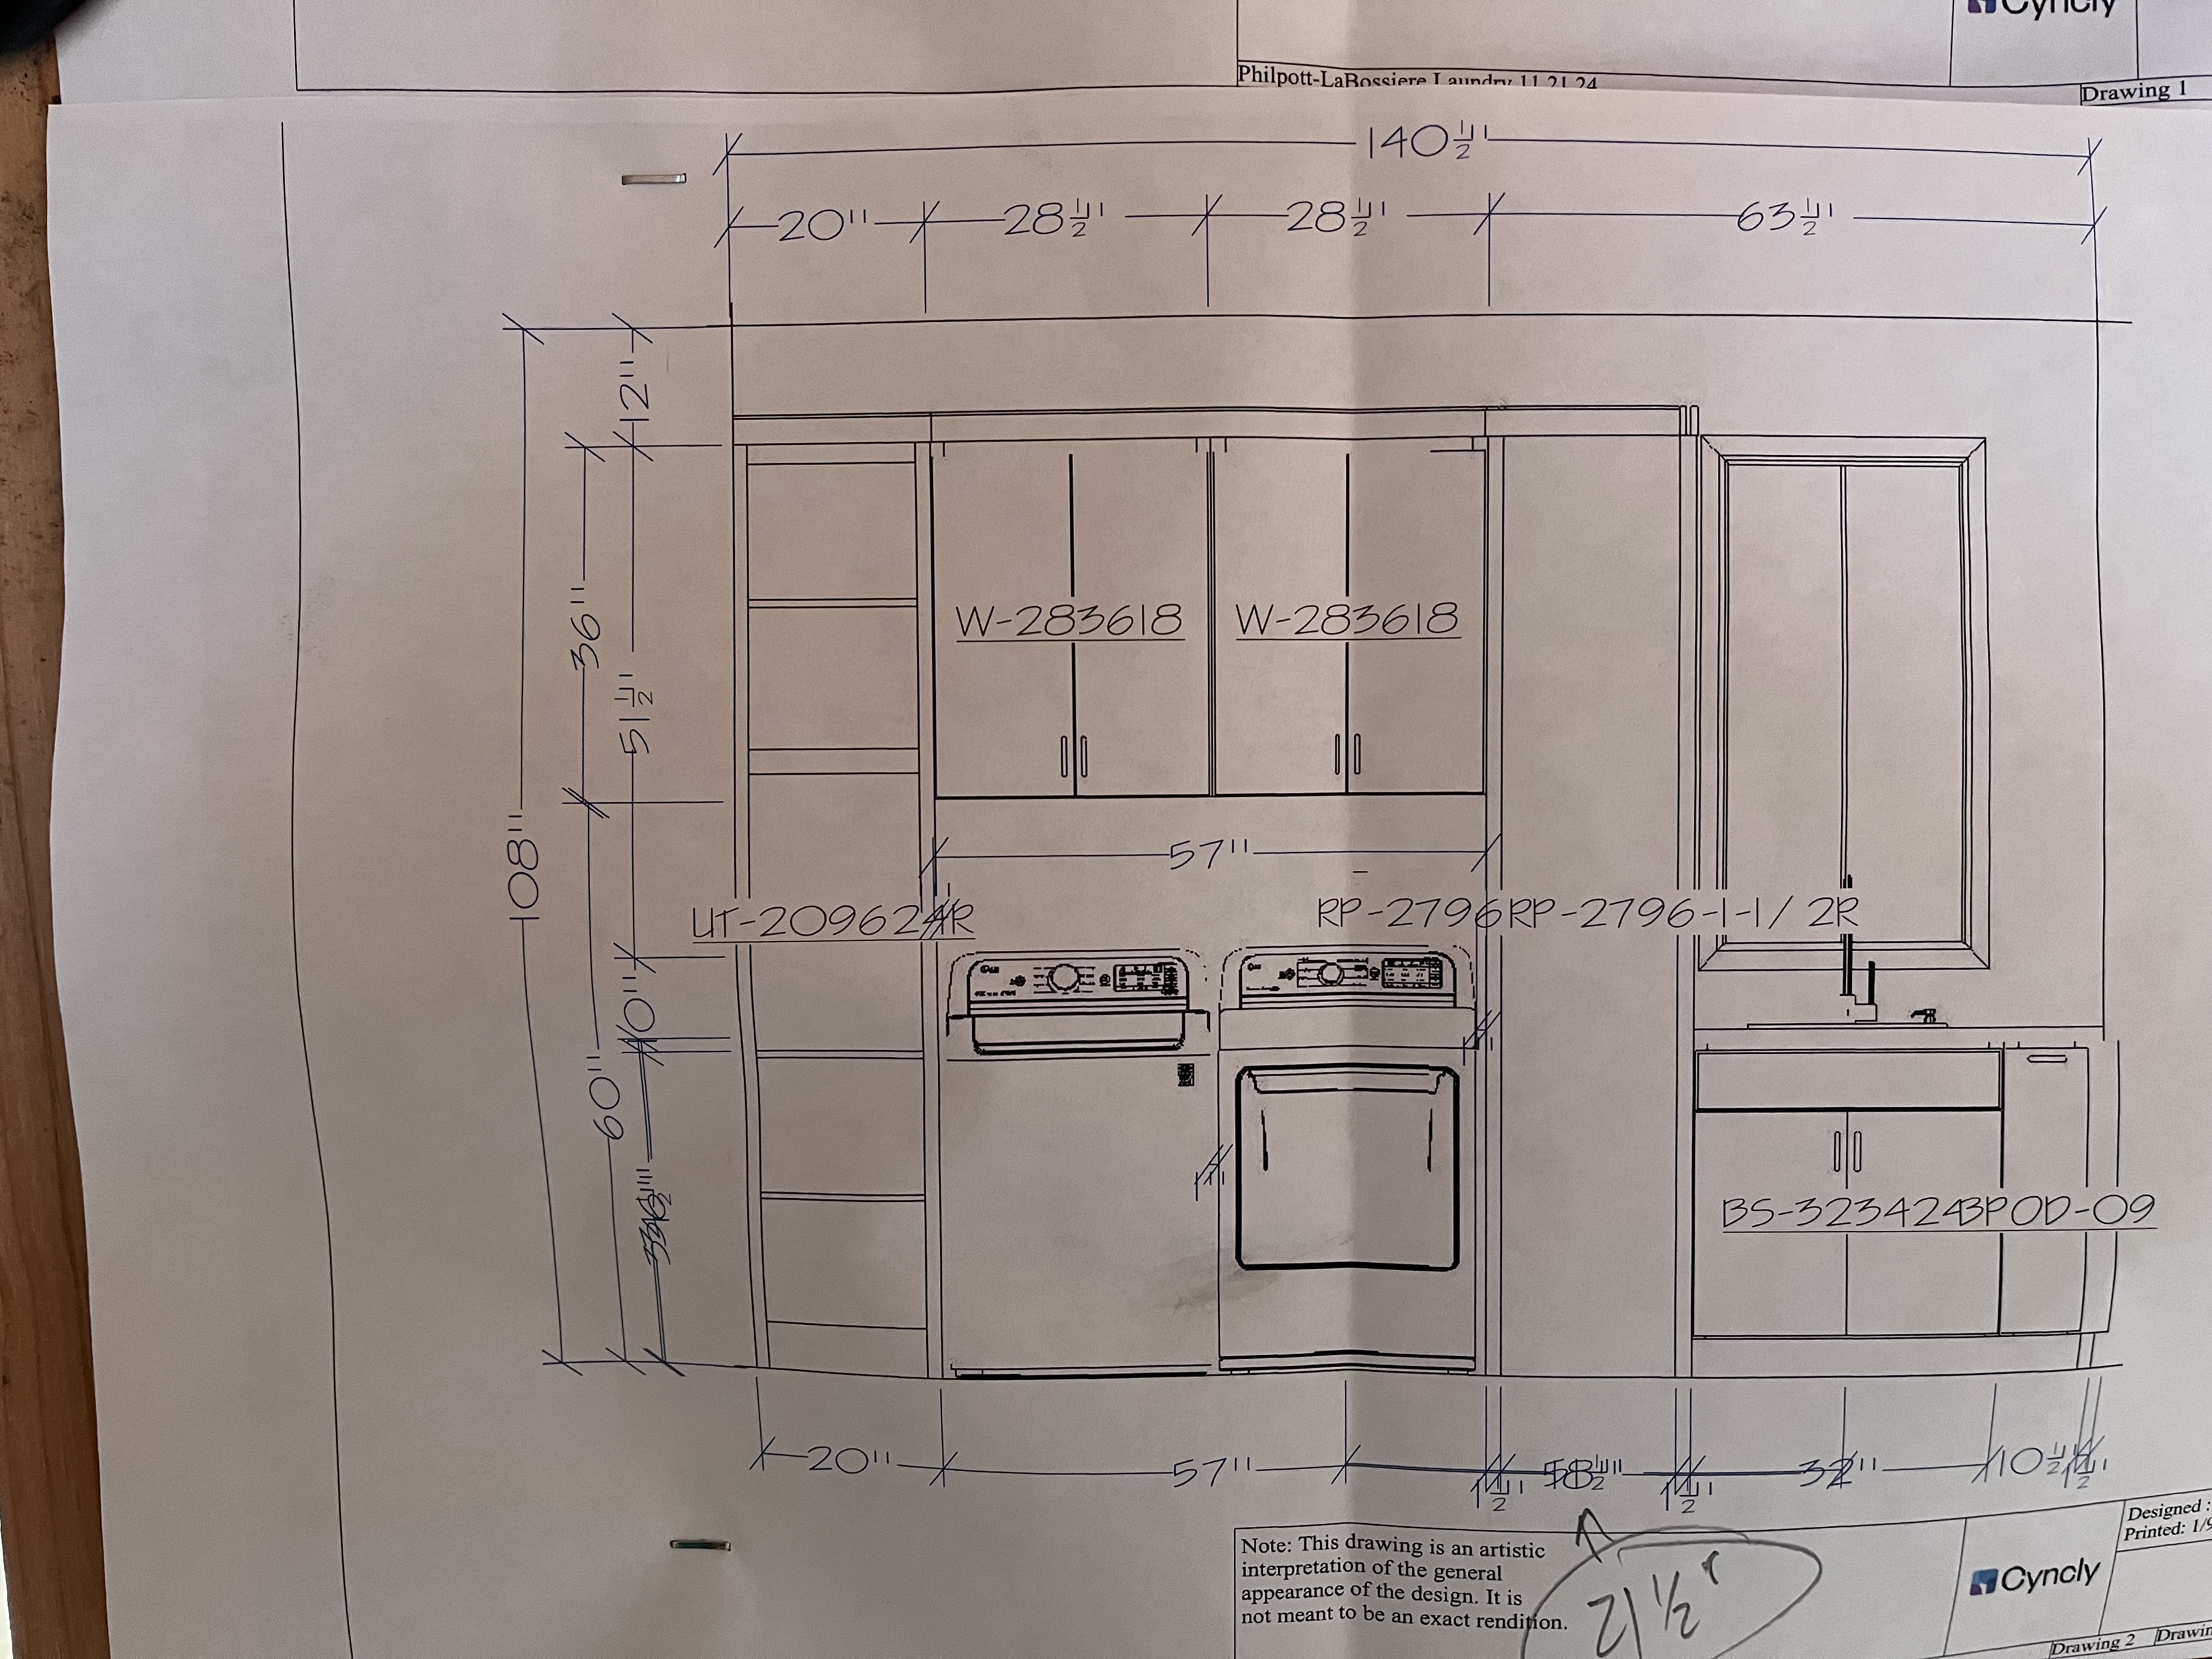
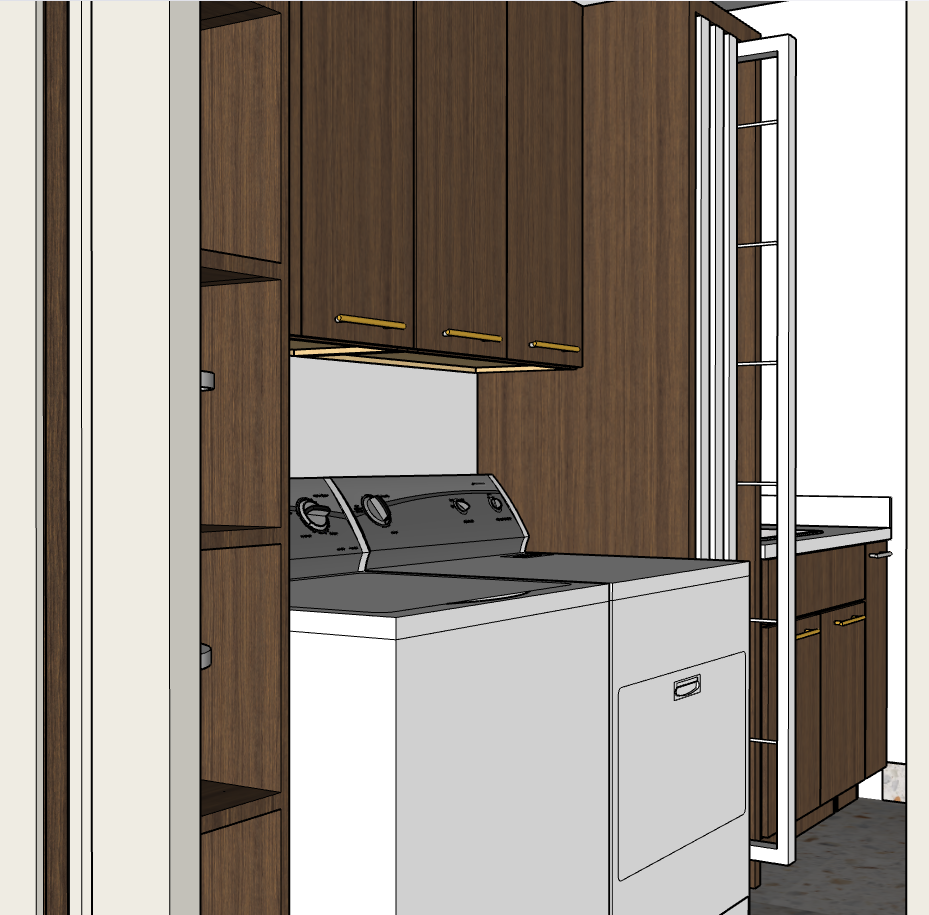
When designing our SketchUp floor plan, Jim and I did our best to avoid plumbing on an outside wall. In a cold climate, like NW Montana plumbing on an outside wall could freeze, burst and develop leaks. We have plumbing in the laundry room sink that will come up from the crawl space. The drains you see in the laundry room space will be hidden by the cabinet’s toe kick space and will not take up any space in the cabinets.

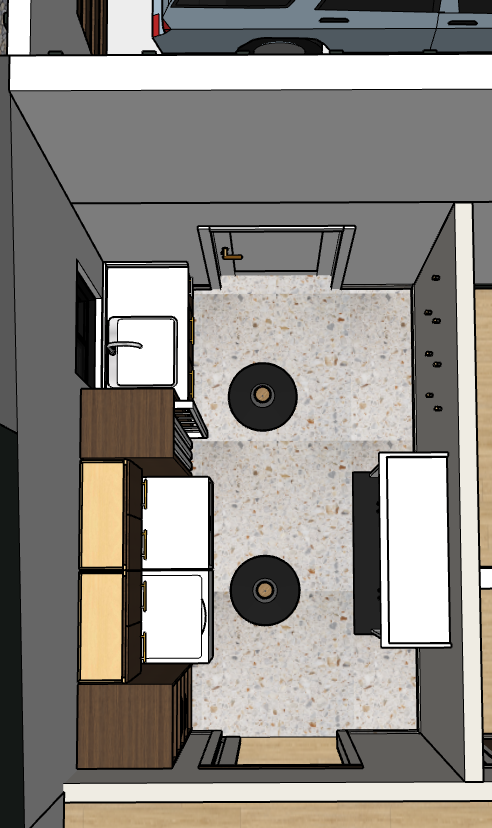
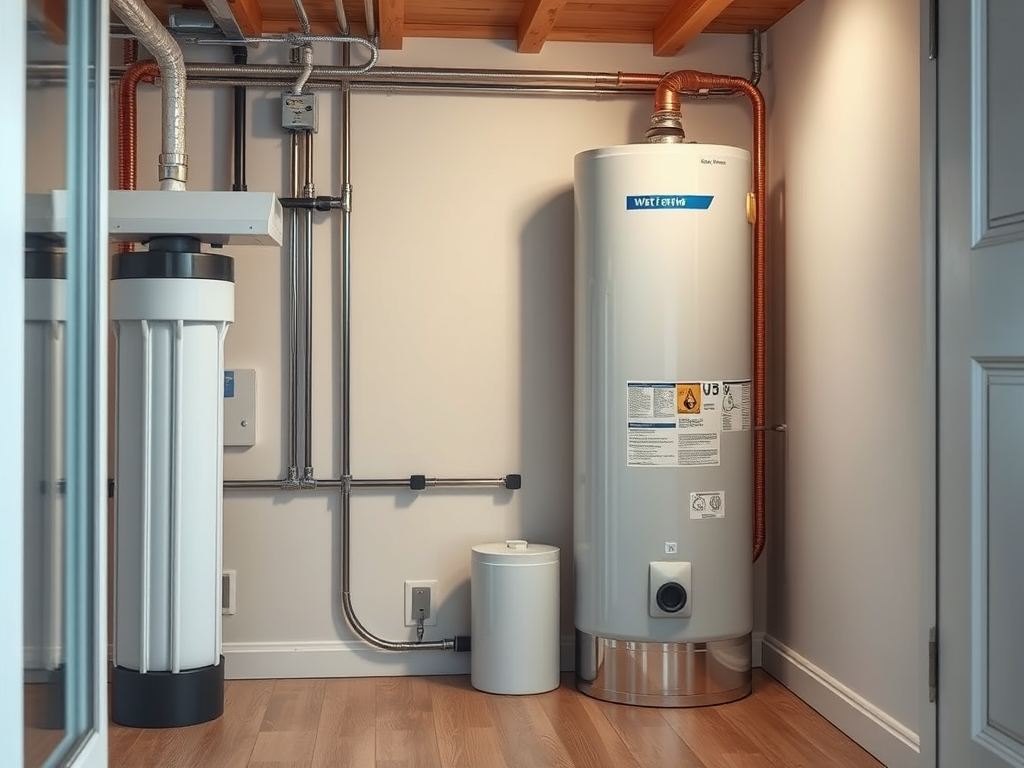
Including a small mechanical room for a water filtration system, hot water heater, and other mechanicals will stop these items from being shoved into awkward areas. I think we’ll also have room for storing cleaning items, like paper towels, vacuum, etc. in that room. Finally, we asked our builder to add a drain to the mechanical room, which will be helpful when we need to drain the hot water heater once a year. It will also help protect other spaces from any flooding that might happen from mechanicals in this space.

Here are some important plumbing points to consider with your home build:
1. Planning the Plumbing Layout
- Fixture Placement: Group bathrooms, kitchens, and laundry rooms together to reduce the length of plumbing runs and minimize the risk of leaks.
- Drainage System: Ensure proper venting and slope for efficient waste removal to the septic tank and drain field.
- Future Needs: Plan for potential future additions like extra bathrooms or a larger water heater.
- Extras: Consider installing a leak monitoring system and automatic shutoffs.
2. Selecting the Right Plumbing Materials
- PEX (Cross-Linked Polyethylene): Flexible, resistant to scale and chlorine, and easy to install.
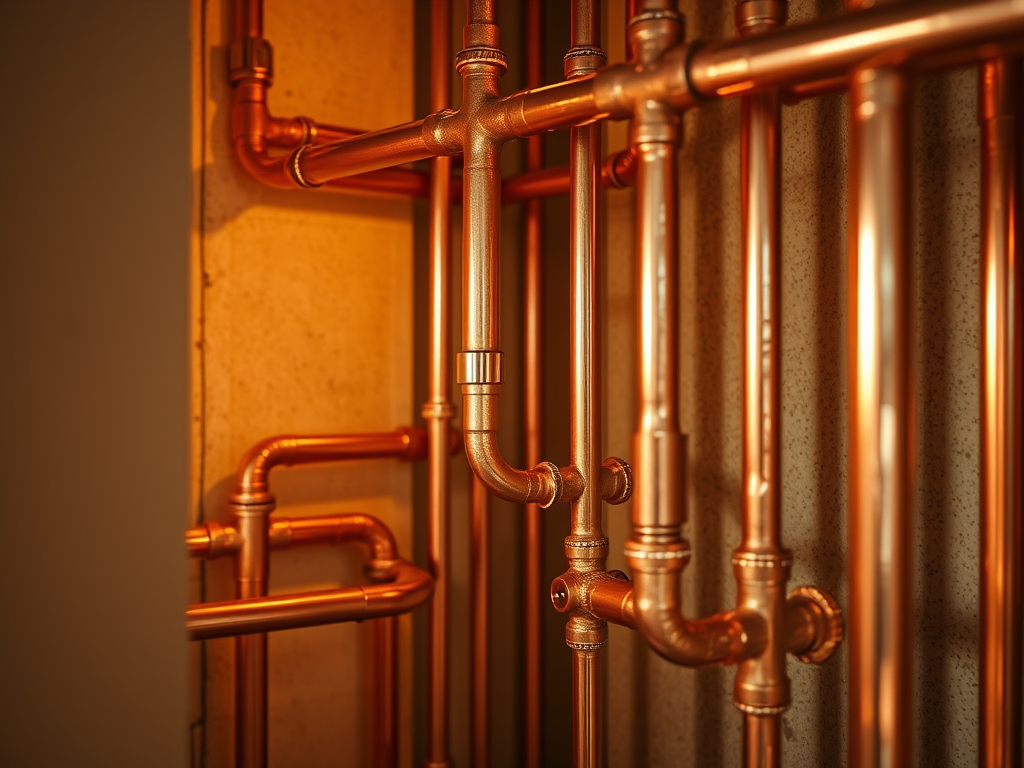
- Copper: Durable and resistant to bacteria, but can be more expensive and prone to corrosion in acidic water.
- CPVC (Chlorinated Polyvinyl Chloride): Suitable for both hot and cold water lines.
- PVC (Polyvinyl Chloride): Commonly used for drain, waste, and vent piping.
3. Ensuring Code Compliance
- Local Building Codes: Follow local regulations to avoid delays and fines.
- Licensed Plumbers: Hire experienced and licensed plumbers to ensure compliance and quality work.
4. Long-Term Durability
- Quality Materials: Invest in high-quality materials to prevent leaks and corrosion.
- Professional Installation: Proper installation techniques are crucial for a long-lasting plumbing system.
5. Working with Professionals
- Collaboration: Work with a licensed plumber to develop a plumbing layout that meets your needs and local codes.
By keeping these considerations in mind, you can ensure that your new home’s plumbing system is efficient, durable, and meets your household’s needs.
Our inspector will look at the following items during his inspection:
- Inspection of pipes and fixtures: Ensuring proper installation and no leaks.
- Testing of water flow and pressure: Checking that all faucets, showers, and fixtures work correctly.
- Review of drainage systems: Ensuring proper slope and installation of pipes.
- Testing of water heaters and other plumbing equipment: Ensuring they are installed and functioning properly.
Consult your builder and plumbing contractor for additional details for your project. Here are some sites where you can learn more about septic systems and wells:
https://www.epa.gov/septic/how-septic-systems-work
https://www.epa.gov/privatewells
Air – Hot & Cold
Our heating, ventilation, and air conditioning system in NW Montana will be very different than South Florida. As you can imagine, currently we need a good air conditioning system to keep us cool most of the year. It’s a pretty simple system, which also comes with an inefficient heat pump. We turn the heat on less than 10 days a year. Funny enough, we’ve got a wood burning fireplace in our South Florida coastal modern home. It works great but gets used even less than the heat pump.

Our stone and walnut clad propane fireplace will create a cozy vibe whether we’re enjoying the view or watching TV.
In NW Montana our HVAC will include a propane fueled furnace and heat pump. Our buried propane tank will also fuel the fireplace. Proper ventilation will include a whole house air filtration system to remove harmful particles, including the byproduct of wildfires. All openings are sealed with zip tape or a similar product, including the windows, doors, plumbing, and electrical openings. The conditioned crawlspace under the house will also be sealed. Jason, J Martin Builders recommended a single-zone system including air conditioning for the house, but we will also get recommendations from our HVAC contractor.

Your new home’s HVAC system should meet several key requirements to ensure efficiency, comfort, and compliance with energy codes.
Here are some important considerations:
- Sizing: The HVAC system should be properly sized based on the home’s tightness, insulation levels, and window placement. An undersized system won’t heat or cool effectively, while an oversized system will cycle on and off frequently, reducing efficiency.
- Programmable Thermostat: Installing a programmable thermostat can help save energy by allowing you to set different temperatures for different times of the day.
- Duct Sealing: All ductwork should be sealed with mastic or approved tape to prevent air leaks, which can account for 10-30% of total home energy loss.
- Mechanical Ventilation: Proper ventilation is crucial in a tightly sealed home. Options include a centrally located efficient bath fan or a heat recovery ventilation (HRV) system that brings fresh air into the house while recovering heat from the stale air being expelled.
- Blower Door Test: This test confirms that the air sealing requirements have been met. The results should show 4 air changes per hour at 50 Pascal pressure (ACH50) or less.
- Infrared Camera Investigation: An optional step, but using an infrared camera can help identify areas with poor insulation or air leaks.
- Energy Efficiency Lighting: Ensure all permanent lighting fixtures are high-efficiency sources.
- Energy Code Compliance: Make sure your HVAC system and other components comply with Montana’s state-wide energy code for new home construction.
I talk more about our site selection and planning, including the propane tank in the post below:
As mentioned earlier, wildfires do occur in NW Montana and our home is located in a wildfire zone. That means we’ll follow wildfire defensible space guidelines around our home. Learn more about defensible spaces in the post below:
Here is another site for planning defensible spaces around your home:
https://www.mtfireinfo.org/pages/homepreparedness

Learn more about air filtration for wildfire smoke at this site:
https://superiormsi.com/which-hvac-systems-filter-wildfire-smoke/
Our inspector will check the following items during his inspection of the HVAC system:
- Inspection of ductwork: Ensuring proper installation and sealing.
- Testing of heating and cooling units: Checking for proper operation and efficiency.
- Thermostat installation: Making sure it’s correctly installed and programmed.
- Air quality assessment: Checking for proper ventilation and air filtration.
Consult your builder and HVAC contractor for additional details for your project.
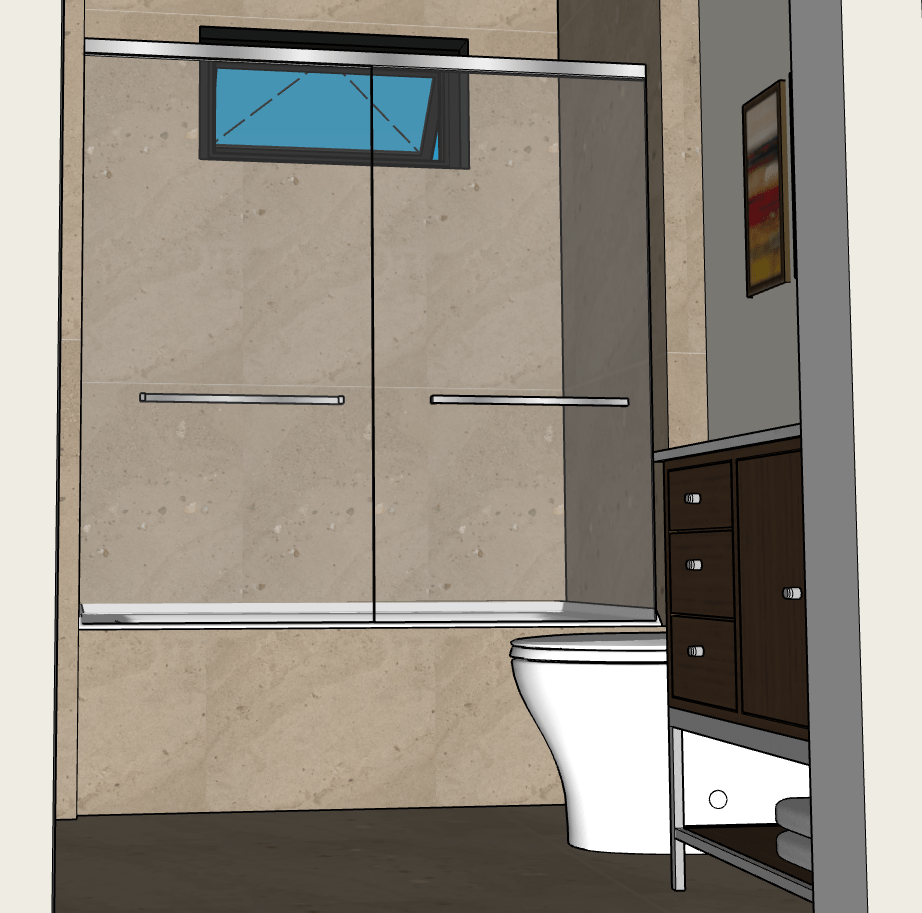
Bathroom Updates
The generously sized primary bathroom provides a soaking tub, spa shower, and double vanity. The toilet is hidden, and we also have a small closet in this space. Natural light will pour into the bathroom from a large and small window located on two sides of the bathroom. The east facing fixed window above the tub will provide beautiful morning light and the south facing awning window will provide fresh air.
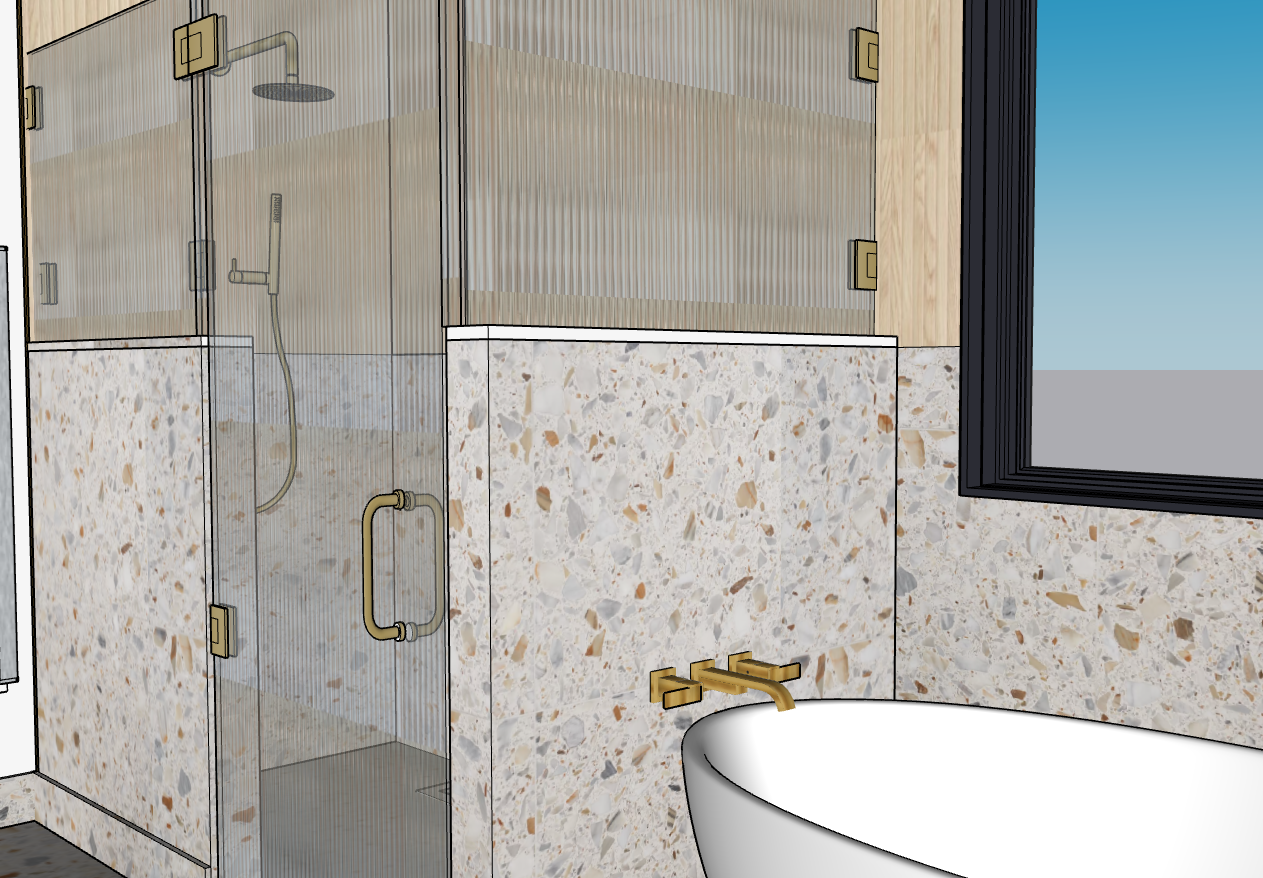

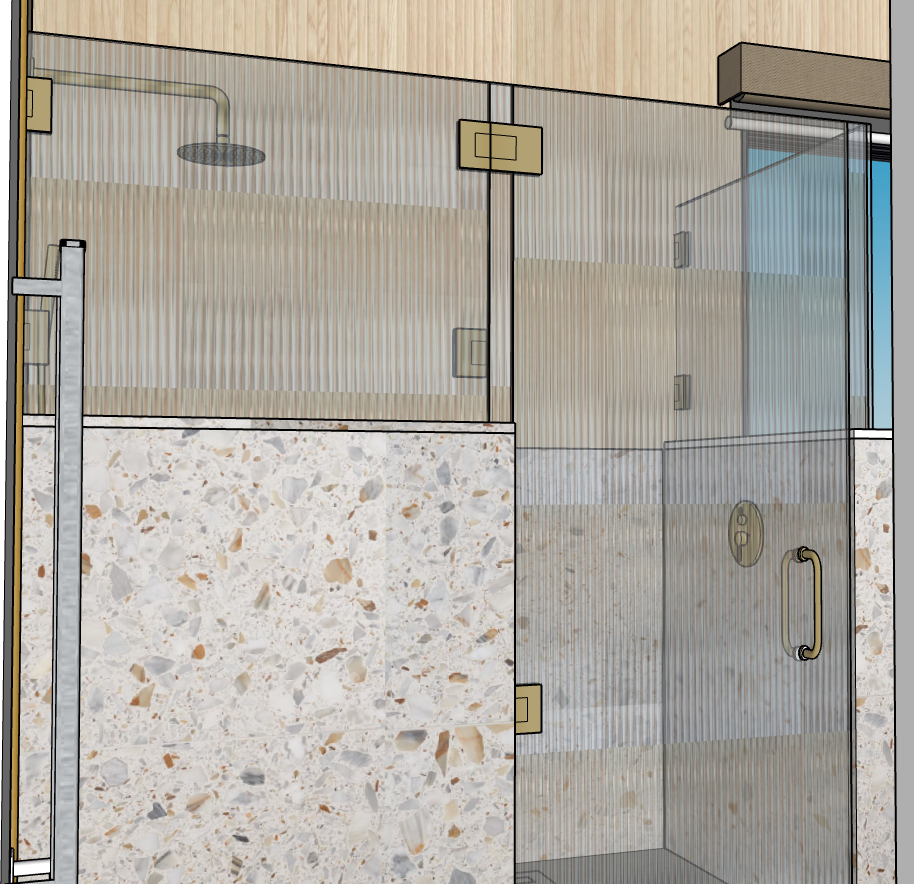
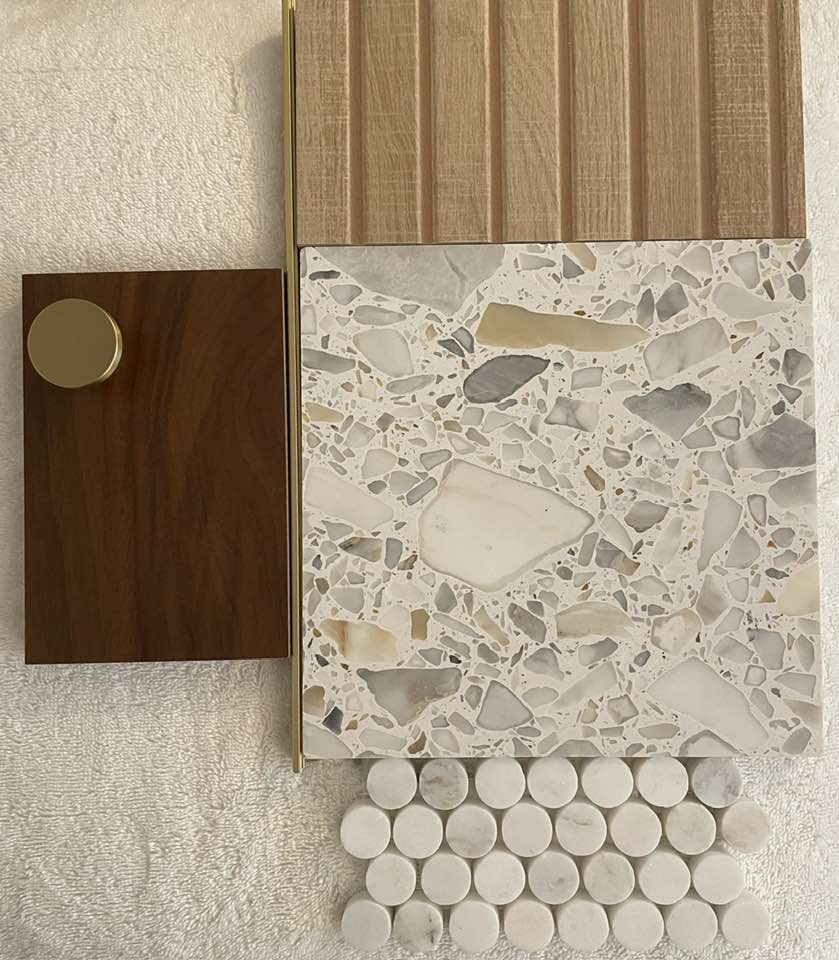
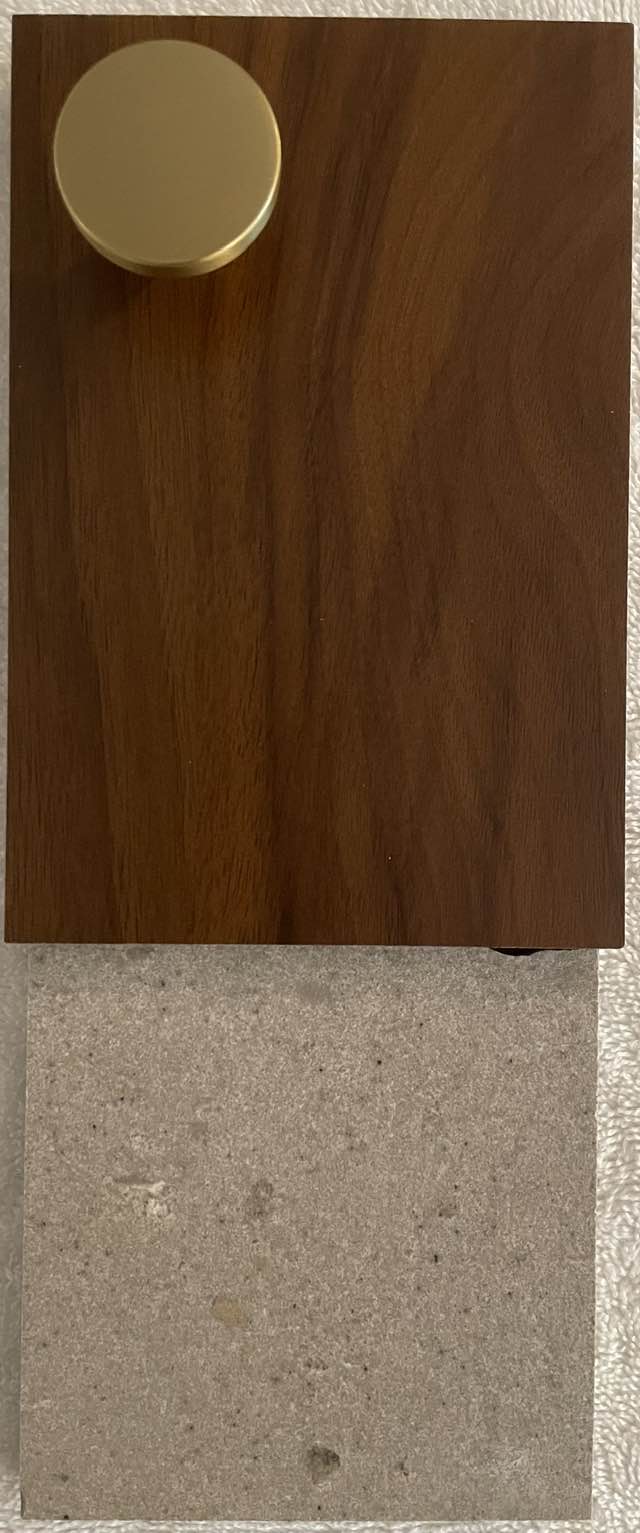
The terrazzo will go on the floors and up the walls in the shower and around the tub. The ribbon tile will go on the wall at 4′, just above the terrazzo in the shower. We have terrazzo in our existing bathrooms and absolutely love it. It comes in many colors and sizes, plus it’s tough and easy to maintain. As many of you know, Mid-Century Modern is our design inspiration and terrazzo was a popular choice during that time period. The walnut double vanity by DeWils Fine Cabinetry will look fantastic and will provide plenty of storage. Below you see the finish samples:
The terrazzo is pricey, so we enlisted our designers at Joni Stoll Design to find lower priced options for other parts of the house. They provided several beautiful choices, and we picked two of those for our guest bathroom, mechanical and combo laundry and mudroom. The I Ciottoli Series compliments the terrazzo but doesn’t copy it, so these rooms have their own unique style.
The lighter Grigio looks great in our guest bathroom. The matte finish is lovely, and it has a little bit of texture, which is great for wet spaces. The movement in I Ciottoli porcelain is beautiful, and the 24 x 48″ size reduces the amount of grout needed. We asked our builder to also put tile in front of the tub, so the eye will take in the floor tiles, then continue up the tub and to the walls just beyond. The DeWils walnut cabinet is a nice contrast with the lighter tiles.
We are using the charcoal-colored Anthracite for our laundry and mudroom combination, as well as the mechanical room. The darker color is perfect for these hard-working areas in our home. The I Ciotolli collection was inspired by natural stone, in particular a sandstone made up of pebbles, rocks and stones.

We’ll be heading out again just before the insulation is installed at the end of February. That gives us an opportunity to make any final changes to the mechanicals, if needed.
Pro Tip: Take pictures of all your mechanicals before insulation and drywall get installed in your home. These photos will help you remember where everything is located, which will come in handy if you ever need to get to any of the mechanicals.
Be sure to subscribe below to never miss a post!

Leave a comment