


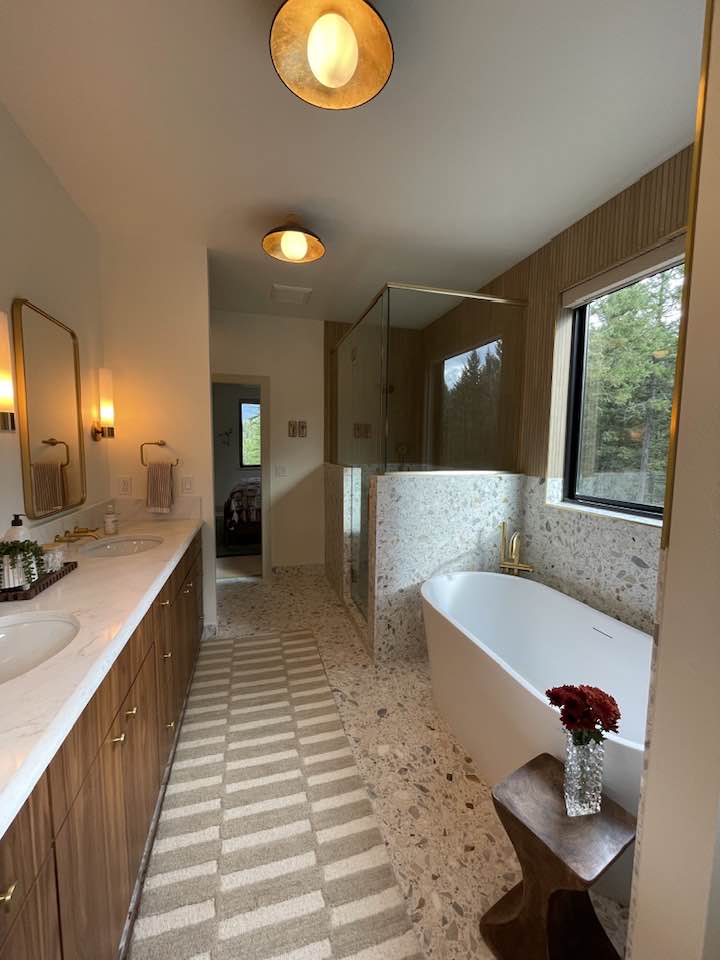
The primary bathroom in our new house has everything we ever wanted in a bathroom. Some things are essential, like a double vanity and shower, but the free-standing tub and the space required for it was a splurge. I also wanted lots of natural light in this space, so the big window above the tub accomplishes that goal. We also have a small awning window that can open for ventilation. In today’s post I’ll share details about the bathroom, including our tile, fixtures and lighting choices.
Bathroom Size
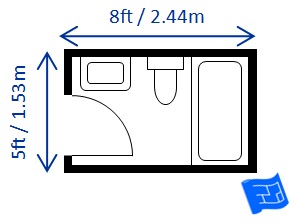
Our primary bathroom is 15 by 10 feet, being longer than it is wide. It’s the biggest bathroom we’ve ever had, and it feels plenty big enough for us. It has room for a large double vanity, shower, free-standing tub, toilet and linen closet. There are certainly larger bathrooms, but I wanted to mention that a smaller bathroom like the one below is perfectly functional for those that don’t have the extra space:
Minimum Full Bathroom Size: 8 by 5 feet
Visit the post below to learn more about standard bathroom and fixture sizes:
https://www.houseplanshelper.com/bathroom-dimensions.html
Double Vanity
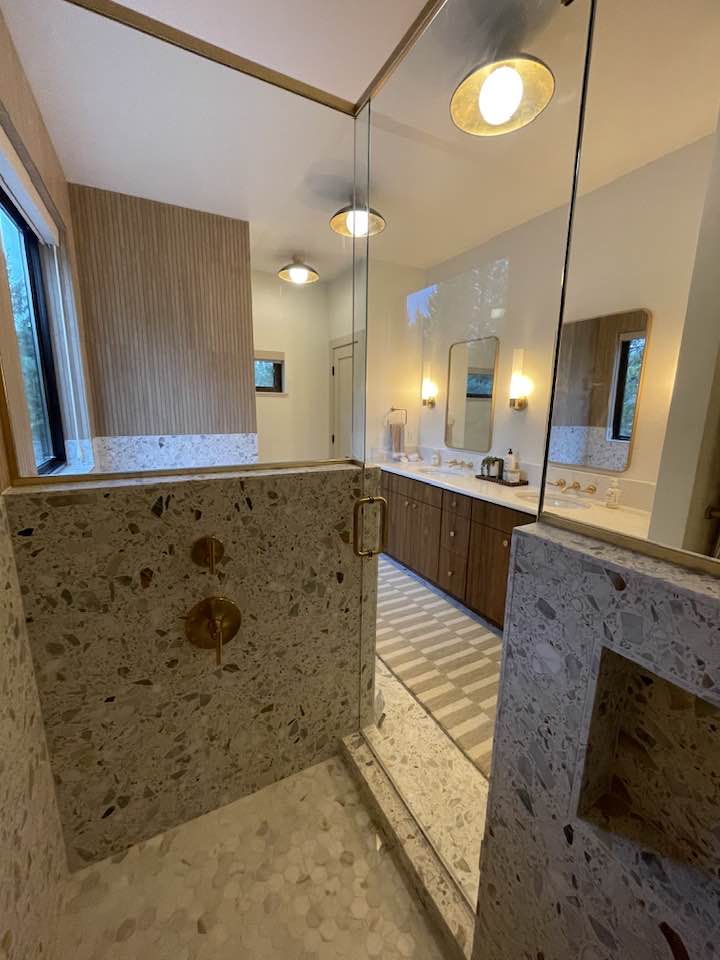
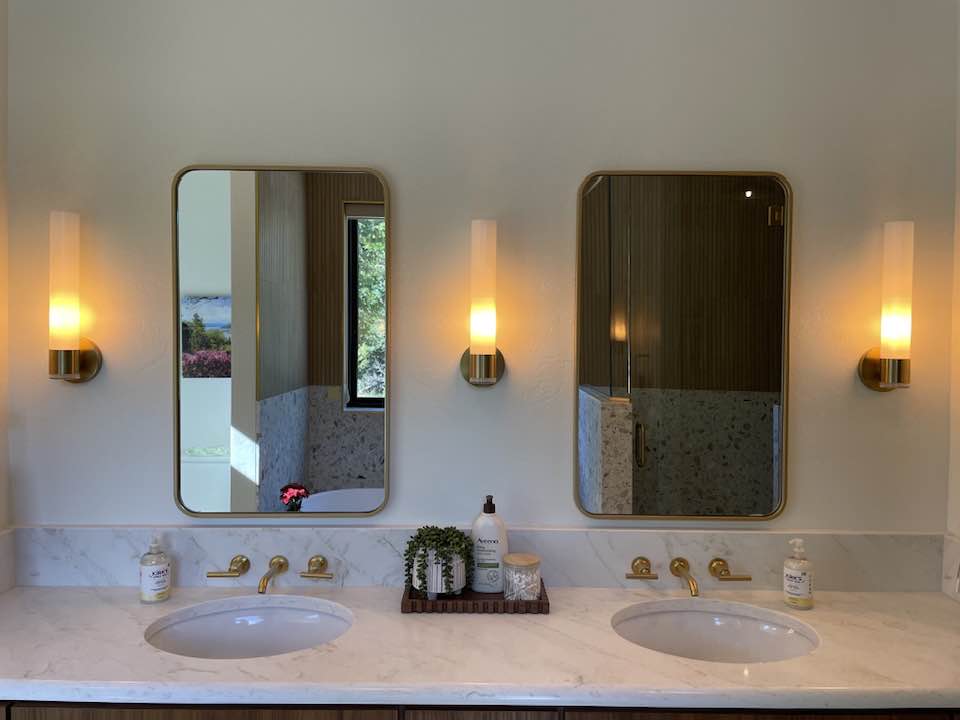
The double vanity is 8 feet long and provides lots of closed storage for all our needs. When designing your bathroom, consider adding enough storage so that 90% of your bathroom items can be hidden away. In our case, we’ve displayed hand soap, lotion and Q-tips. The hand towels and faux plant in ceramic planter are visible and part of the decor in the bathroom.
The walnut vanity by DeWils Fine Cabinetry is beautiful and well-made, including dovetail drawers, as well as soft-close for both drawers and doors. We picked the flat panel, vertical grain match cabinets but they have other wood species and styles too. The solid brass knobs come from Amazon. The large brass mirrors are functional and reflect light coming into the space from the large window opposite of the vanity. The round porcelain undermount sinks are easy to clean. Finally, we chose a subtle marble patterned quartz for the countertop. This quartz was affordable and will be very durable.
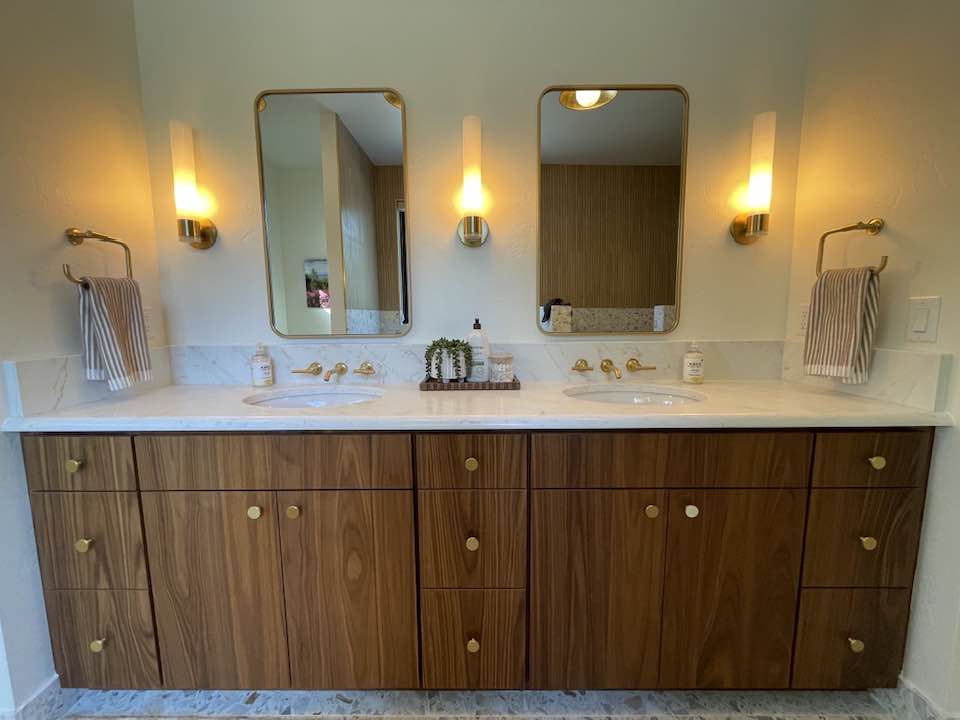
Pro-tip: Whether you go with a custom or off-the-shelf route, look for vanities that are 36 inches tall. If you’re on the shorter side, consider a 32-inch height. If you’re not sure, go to a bathroom showroom, stand in front of a few sinks and see how they feel when you bend over them. Remember to leave 24 to 30 inches between the vanity and bathtub or shower. Hang the bottom of the mirror 5 to 10 inches above the countertop. As you can see, our mirrors are just above the backsplash or about 6 inches above the counter.
Fixtures
Classic brass is our finish of choice for our faucets, shower and tub fixtures. In addition, we used brass for our cabinet knobs and miscellaneous items, like heated towel bar, toilet paper holder, hand towel holders, and towel hooks. Bathrooms are smaller spaces, so I recommend using the same finish for all your fixtures. Other classic metals to consider is polished or brushed nickel. Many folks have used matte black, but please know that this finish shows every spot and will need extra care to keep it looking nice.
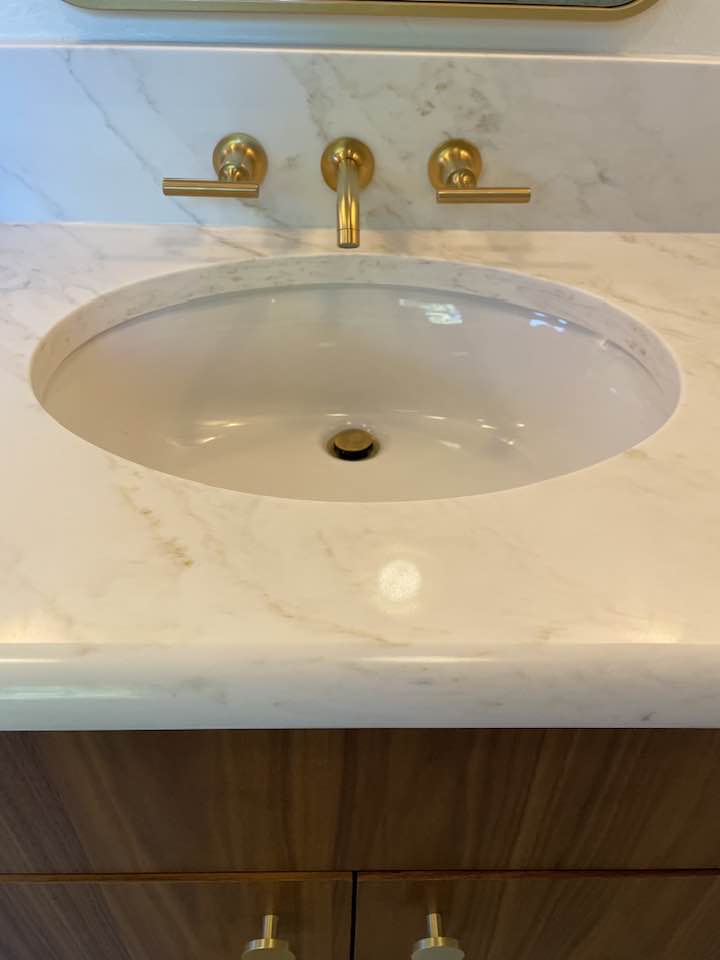
We picked the Kohler Purist wall-mounted faucets for the look and ease of cleaning. They are more expensive than deck-mounted faucets. They also turned out to be a bit of a challenge for the plumbers. We chose a lever handle for our faucets, but they also come in a cross pattern. The lever style is the most popular and easy for children and older folks to use. You can also consider a single handle, which controls both hot and cold temperatures and is also easy to use. Finally, motion or touch faucets can help conserve water but I’m not confident in the longevity of these fixtures.
Bathtub
In choosing your tub, you’ll want to consider your daily routine. In choosing one, think about what kind of “experience” you want to have there. Are you the five-minute, shower-only type? Or are you looking to do some serious soaking with salts and steam? Either way, size, cost, style, material, and weight will also factor into your decision. We decided on a soaking tub, which is deep enough to fully submerge yourself in it. Here are some options:
- Standard: Five feet long by 30 inches wide
- Soaking: Same as above except deeper, so you can fully submerge
- Whirlpool: Includes jets to target large muscle groups and relieve joint pressure
- Air: Instead of a few concentrated jets, these tubs disperse air more evenly to create a relaxing, effervescent atmosphere
- Walk-in: Typically used by people who need better accessibility, this style has a “door” and a seat feature built in
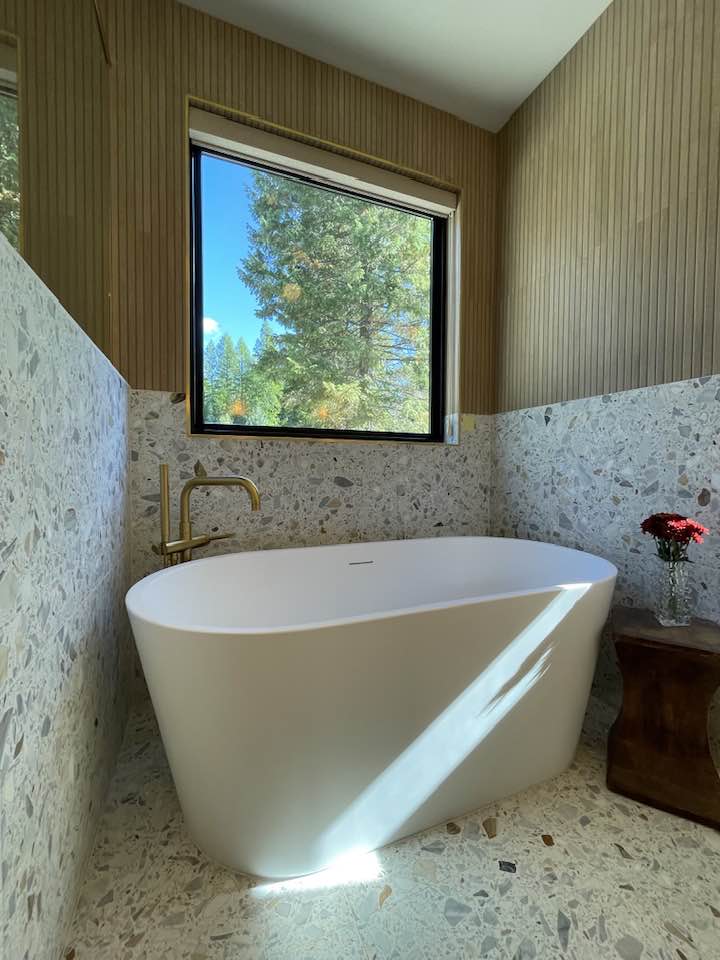
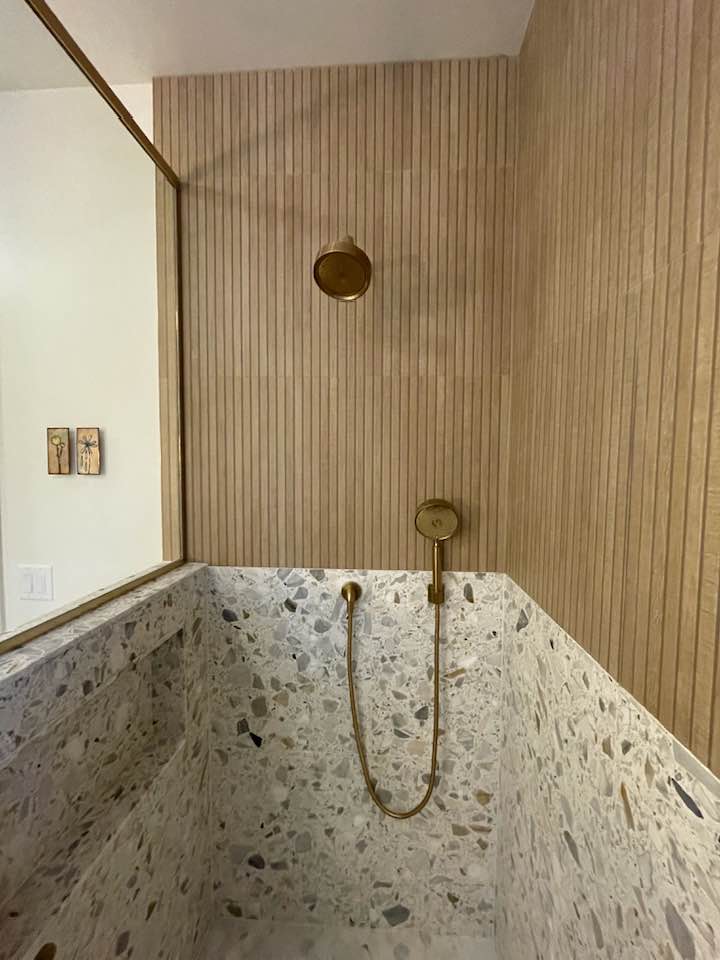
Our free-standing tub has a floor-mounted tub filler and hand-held wand by Kohler for easy cleaning and rinsing. Instead of the tub filler, you could pick a wall-mounted or deck-mounted tub spout. When choosing, think about your head placement and which way you want to face while soaking in the tub. No matter what type of tub or faucet you pick, you’ll want to have a waterproof surround to keep water from seeping into your walls and floors. In addition to the functional component, tile surrounds can have a major impact aesthetically, acting as a backdrop to your fixtures and tub. In addition to a freestanding tub, you might consider these other options which can be easier to clean around and easier to get into and out of:
- Alcove: With one finished side and three other sides that serve as your walls or “surround,” this is the easiest option to replace if the need arises.
- Drop-In: Also known as “platform tubs,” drops-ins are only the shell of the tub, which is placed in a wooden frame for support and then finished off with tile. This is the choice we made for our second bathroom.
- Undermount: Although installation is similar to drop-in styles, the difference here is that the top or “deck” of the tub is covered with tile or stone. These tub choices tend to be on the pricier side.
Shower
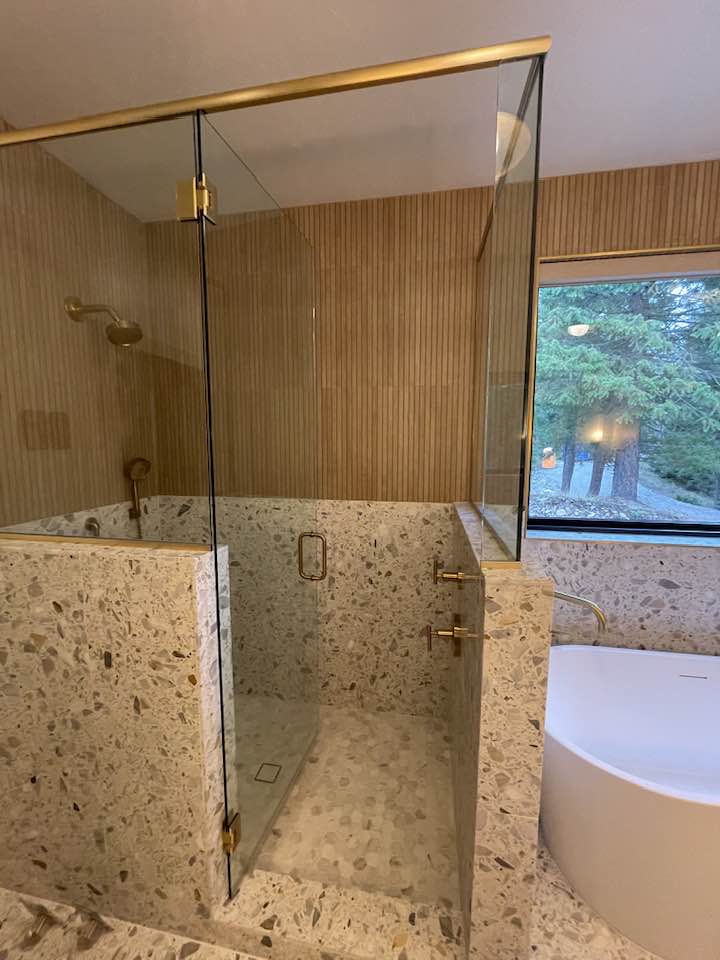
We are thrilled with the size of our 5′ 6″ by 3′ 4″ shower. There is plenty of room for us to shower without bumping into the walls or glass. The smaller size and eight-foot-tall glass walls ensures we stay warm while showering. In a cold climate like NW Montana, we prefer to be fully enclosed instead of using a partial glass panel or shower curtain, which would let the heat out and the cold air into the shower. The four foot pony walls offer more privacy, and the glass above still makes the space feel open. This shower door can swing in or out, but we’ll probably swing it in to avoid water dripping on the floor.
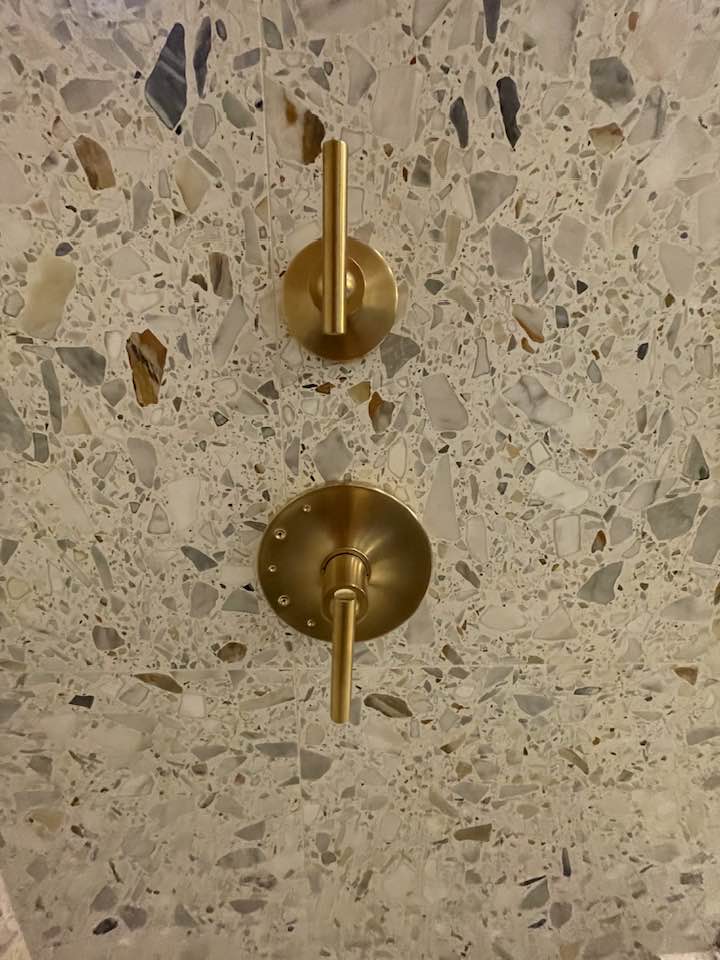
We placed the Kohler Purist shower handles within easy reach, so we can avoid being sprayed with water when they are turned on and off. The lower lever is for the Kohler Purist shower head, which offers a strong flow and steady temperature. The top lever is for the matching handheld fixture, which we’ll use to rinse off the shower when cleaning. This handheld came with a sliding bar, which is great for families that have vast differences in height. We prefer the look and easy cleaning of a small mount for the handheld.
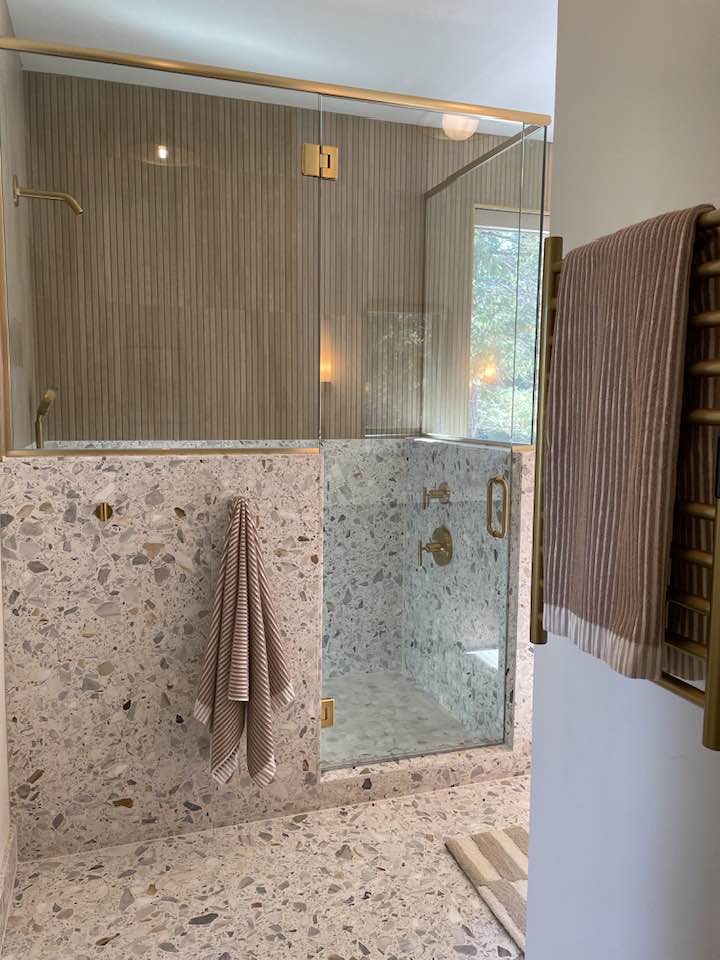
Our builder recommended a local glass company that offers Hartung’s Diamon-Fusion Hygienic shower glass. This glass repels water and stains for the life of the glass. All we have to do is rinse the glass with clean water and use a squeegee or towel to wipe off any remaining droplets. No harsh chemicals need to be used, but once a month a nylon body puff should be used to go over the surface until clean and smooth. Then rinse and wipe down any remaining droplets. You’ll want to activate your warranty, just in case you ever need the glass serviced.
Tile
In the last couple of gardening posts, I’ve mentioned the abundance of rocks around our build site. These rocks are more jagged than the ones smoothed by the local rivers, but they all have pretty colors when wet. The terrazzo we’ve chosen for our primary bath is reminiscent of the rocks scattered throughout our property and Flathead Valley. In our bathroom, we mixed a honed terrazzo from Italy called Sacra Calacatta White with a wood look matte fluted porcelain tile that we’ve seen at Tilebar. I’ve also seen less expensive versions at local tile stores. It is a beautiful combination that adds texture and color to the space. The 24 by 24-inch terrazzo tiles are installed on the floor and continue four feet up the walls in the shower and around the tub. We also used the terrazzo on top of the two pony walls. Remember, pony walls or shelves in showers need to be sloped so water will not sit on them.
The 24 by 48-inch wood-look tile continues to the ceiling in the shower and tub area. The large format tiles reduce the amount of grout lines in our bathroom making the space easier to keep clean. The material in the terrazzo goes all the way through, which makes for a beautiful edge look. The porcelain corners must be mitered or trimmed with Schulter. We didn’t have many outside edges, so we used gold trim around the window and at two other places. The gold trim actually looks great with the shower trim and other brass elements.
Shower Drain
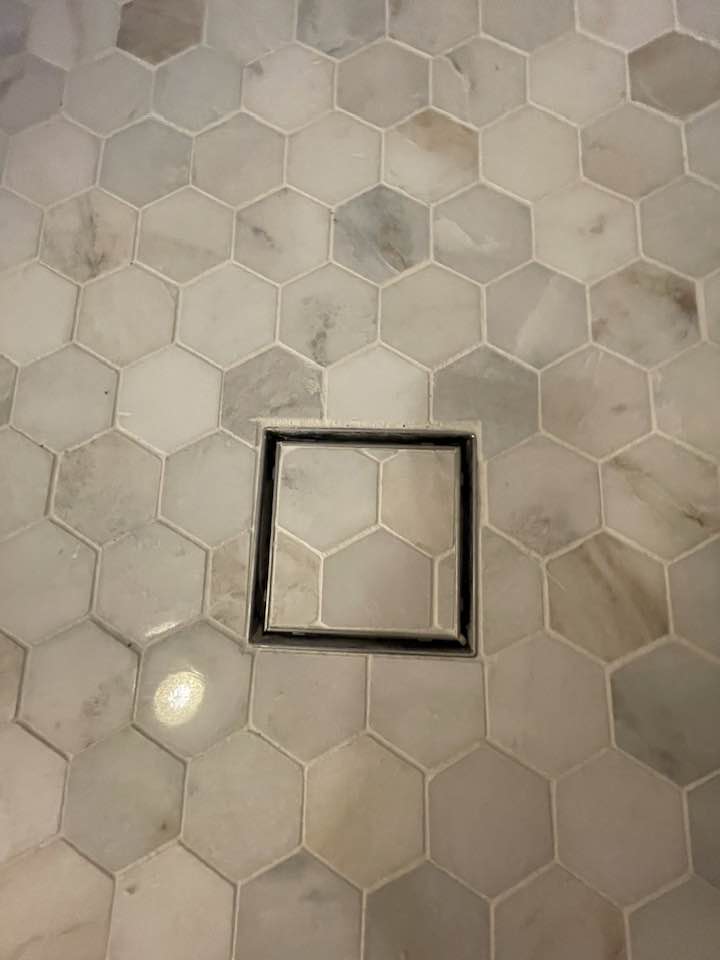
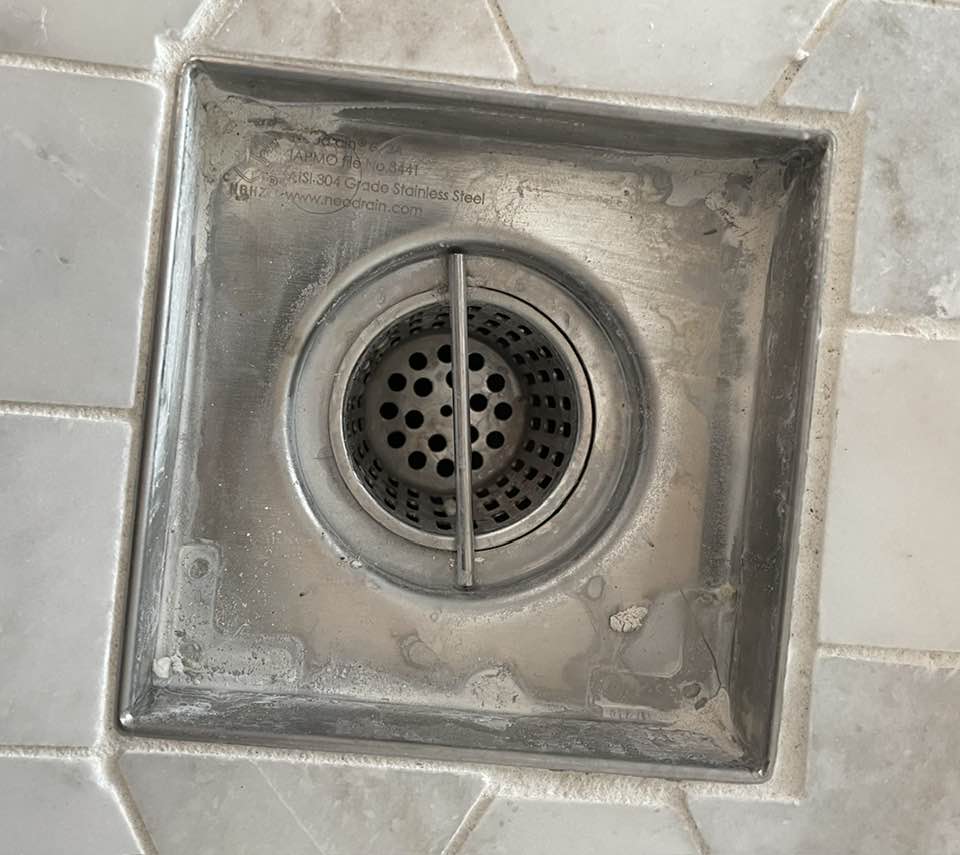
The Alaska White 2-inch Hexagon polished marble mosaic tile looks great with the other tiles in the shower. The smaller size provides plenty of traction on the shower floor, so they are a safe bet to avoid slipping. A lot of folks are doing a long, linear tiled shower drain, which we considered. However, after research showed they can get pretty nasty, we decided to go with a smaller tiled square version centered in the shower. It looks great and it is easy to clean. The little cup traps hair or other small items to help avoid clogs and other plumbing problems.
Lighting
Before you get into the fun part of choosing between lighting options, you need to have an official electrical plan. Of course, because we built a new house our bathroom electrical plan was just one part of the whole electrical plan for the house. The electrical plan is a great time to enhance each room’s ambience. Simply walk through your home or room and imagine where light switches and outlets should go. Think about where you’ll place ceiling, sconces, table and floor lamps, as well as electronics like TVs or record players. Don’t forget to include enough outlets in your bathroom for electric toothbrushes, hair dryers, shavers, etc. Finally, add dimmers to your lights, including bathroom lights. You can thank me later.
Lighting plays an important role in creating ambience, which has a direct impact on your mood. A well-lit room should include three different types of light:
- Ambient: This is where a room’s overall illumination comes from, typically natural light and the lighting that substitutes for natural light.
- Accent: These are your more decorative fixtures that work to shine a light on your decor, artwork, or the architectural features of your home.
- Task: As the name implies, these fixtures provide the illumination you need to perform tasks like reading, applying makeup or cooking.
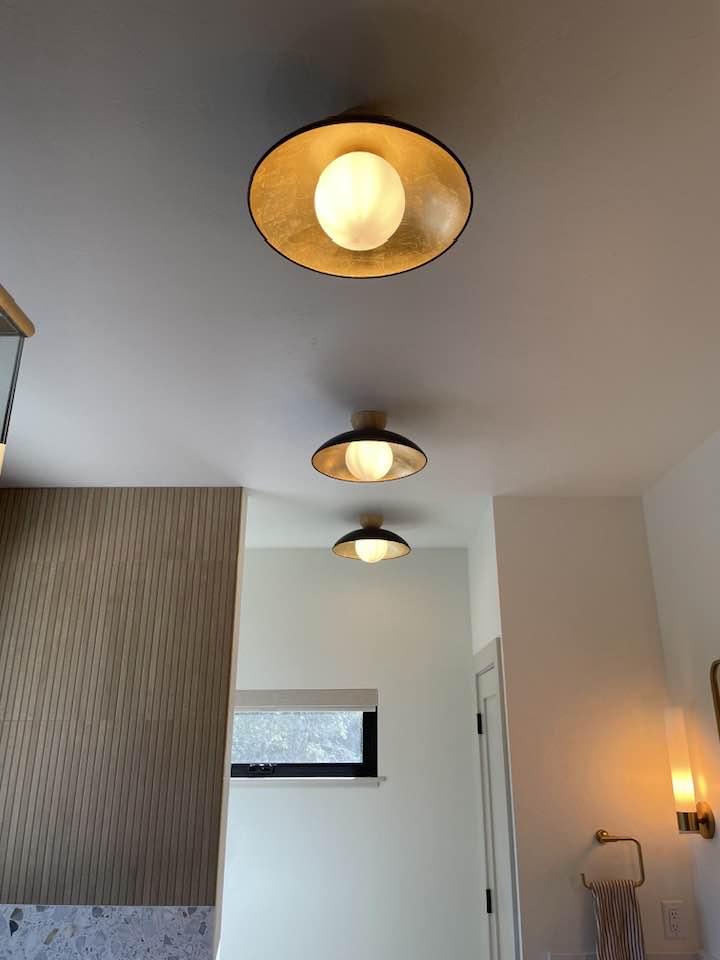
In addition to the semi flush ceiling lights, you saw in the picture above, we also have wall sconces next to the bathroom mirrors. We installed these sconces, so that the light source is eye level and placed equal distances from the mirrors. I prefer warm lights at 27k, which is very flattering to the space and person.
Here are some additional lights you might want to consider for different zones in your home:
- Recessed: These should be used sparingly in places like kitchens or maybe a home office or craft room, where you need to be able to see well.
- Track Lighting: These are great for adding light without having to do much renovation. Plus, you can direct the individual lights where you need them.
- Flush or Semi-Flush: These are a great way to add light and personality to your space.
- Chandeliers and Pendants: These can add a decorative element and provide additional task or ambient light.
- Table and Floor Lamps: No renovation needed with this option. They can provide both task and ambient lighting.
See my post, Hit the Lights to learn more about lighting your space:
Functional Spaces
Shower Niche
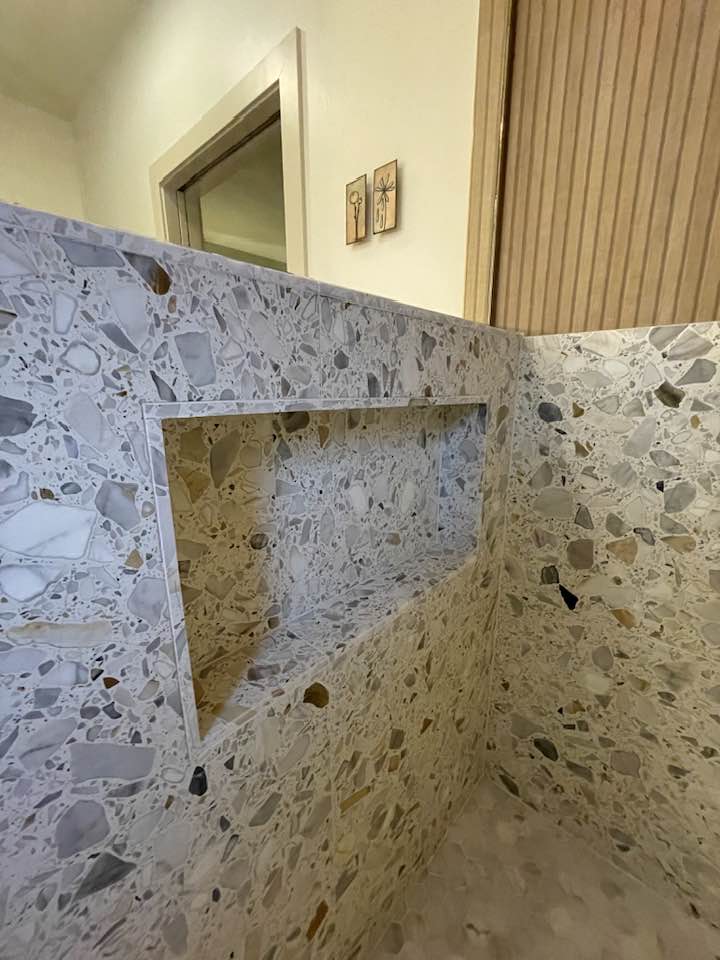
The shower niche is hidden away and big enough to hold large shampoo and conditioner bottles. It’s also low enough for me to be able to place a foot there and shave my legs. I know some folks like to add interest here by using a different tile, but we prefer a clean stream-lined look, which we accomplished by using the same terrazzo. The bottom of the niche is also angled to avoid water sitting on top of it.
Linen Closet and Toilet
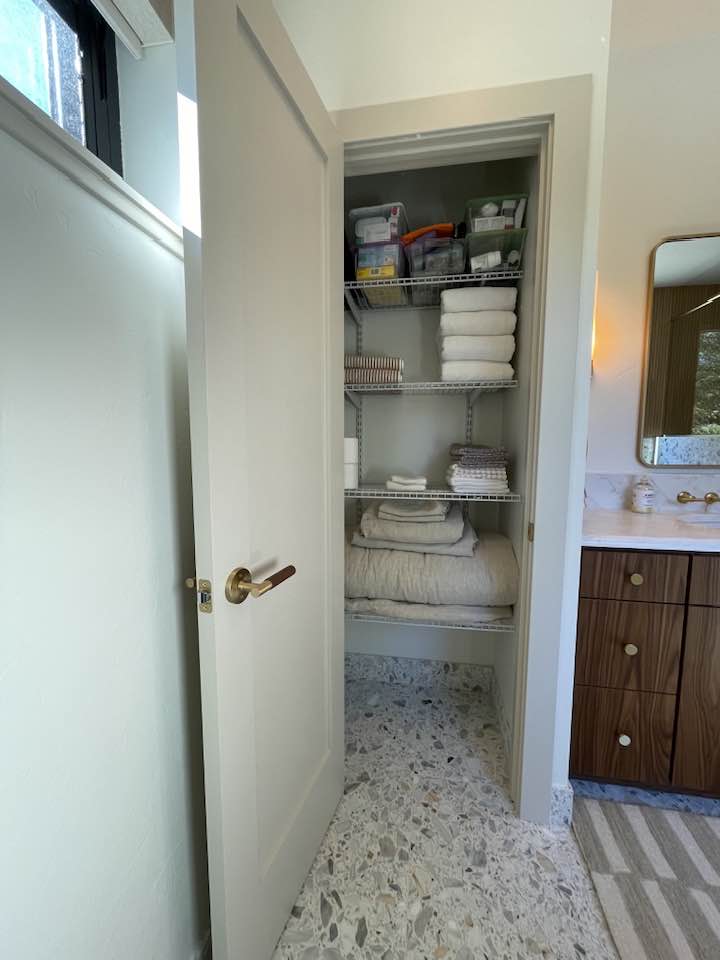
We had room for a small linen closet in the bathroom, which is great for extra toiletries, toilet paper, towels, and bed linens. My hubby, Jim saved us some money and installed the wire shelves from Home Depot. They are adjustable and provide plenty of space in this closed storage area.
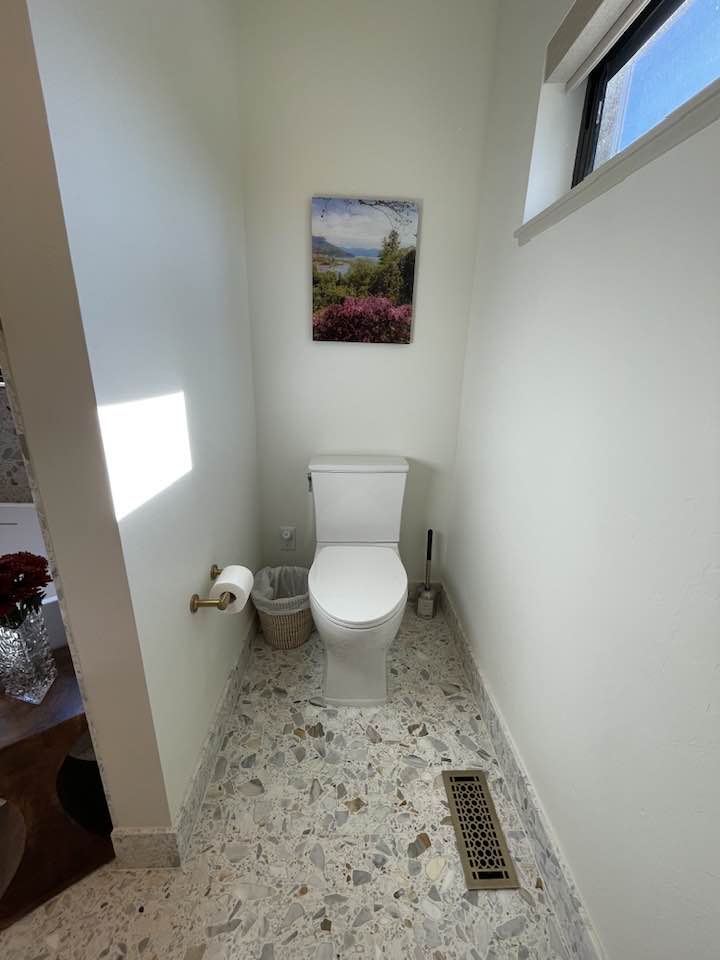
The toilet is tucked away and can’t be seen from the bedroom. We preferred to have a linen closet instead of a fully enclosed toilet. We chose an apron toilet, which is really easy to clean. The straight sides don’t trap any dust or other unmentionables. Just spray with a disinfectant and wipe it down. We had several of our favorite vacation photos enlarged on Acrylic several years ago. The one below is from a beautiful public garden in Northern Italy where we spent the day exploring.
Did you miss my last post, Great Room Reveal? You can find it below:
The weather has turned cool and we’re enjoying beautiful sunny fall days right now. In the future, I’ll share more posts about the house and garden, as well as adventures we have in our new home state. Be sure to subscribe below to never miss a post.

Leave a reply to Shannon Chiba Cancel reply